Experimental FPS Lighting design. Everything will be okay
Inspiration
In early 2022 I relocated from Manchester, England to Los Angeles, California for a new job. It affects my personal and professional life in multiple aspects. Those vehemences become the inspiration for my latest personal project, which later is named everything will be okay.
Some thoughts about lighting a level
I trust many of my fellow lighting artists might have similar experiences as myself while dealing with certain tasks; Some of the certain maps/ environments could always be tricky for lighting. A wide open space with a requirement of fine visibility, at a none magic hour time of day, could be a golden case for this exact lighting study, from the perspective of design and execution.
Every lighting artist has their own favorite hours, in my previous personal work, I tend to use a lot of overcast sets. An overcast weather condition is the most forgiving lighting condition to prevent the detail for interior/ semi-interior scenes. I fall in love with Astero’s artwork on Artstation The artist turns a flat 12 O’clock white sunlight into many mesmerizing visual results in a combination of fog and dust effects. In addition, the city ruins level from Nier Automata also become my inspiration for this new project.
Risks and Challenges
Though the momentum of the new style pushes me quite far from looks that I am familiar with, such as low-key lighting, positive fill, soft bounce, and gently touch of shadows; The new style I am trying to pick up is also considered a less ideal lighting condition for a striking look. Below are three primary questions I’ve asked myself.
- How to create the contrast?
- How to avoid noisy looking under high-key lighting conditions?
- It is a relatively flat space almost fully exposed under direct sunlight, how to add depth and make the image more interesting light-wise?
While listing the potential visual challenge for myself, I noticed an interesting fact that all of those three questions are talking about the same issue, contrast.
Personally, I tend to use a light ratio often while describing the level of contrast. Instead of calling it ‘sharpen’ or ‘soften’
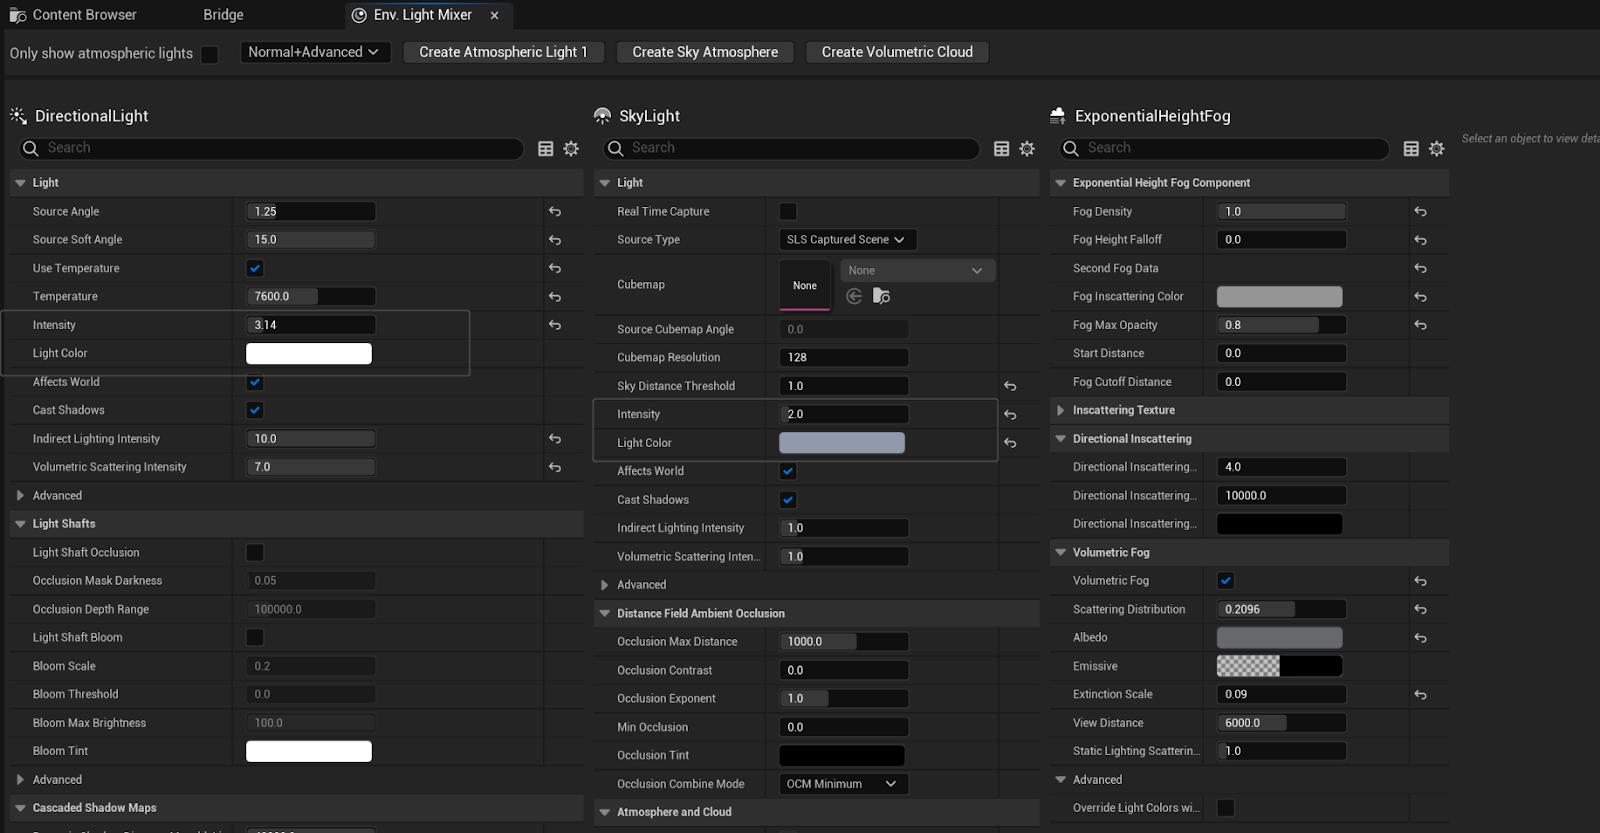
- My atmosphere lighting setup
The directional light remains at 3.14 while I doubled the intensity of the skylight here. I made this decision due to the scene is heavily concentrated on the ground. Boosting the skylight intensity gives me a better response to the bouncing light among objects.
1. Constructing the scene
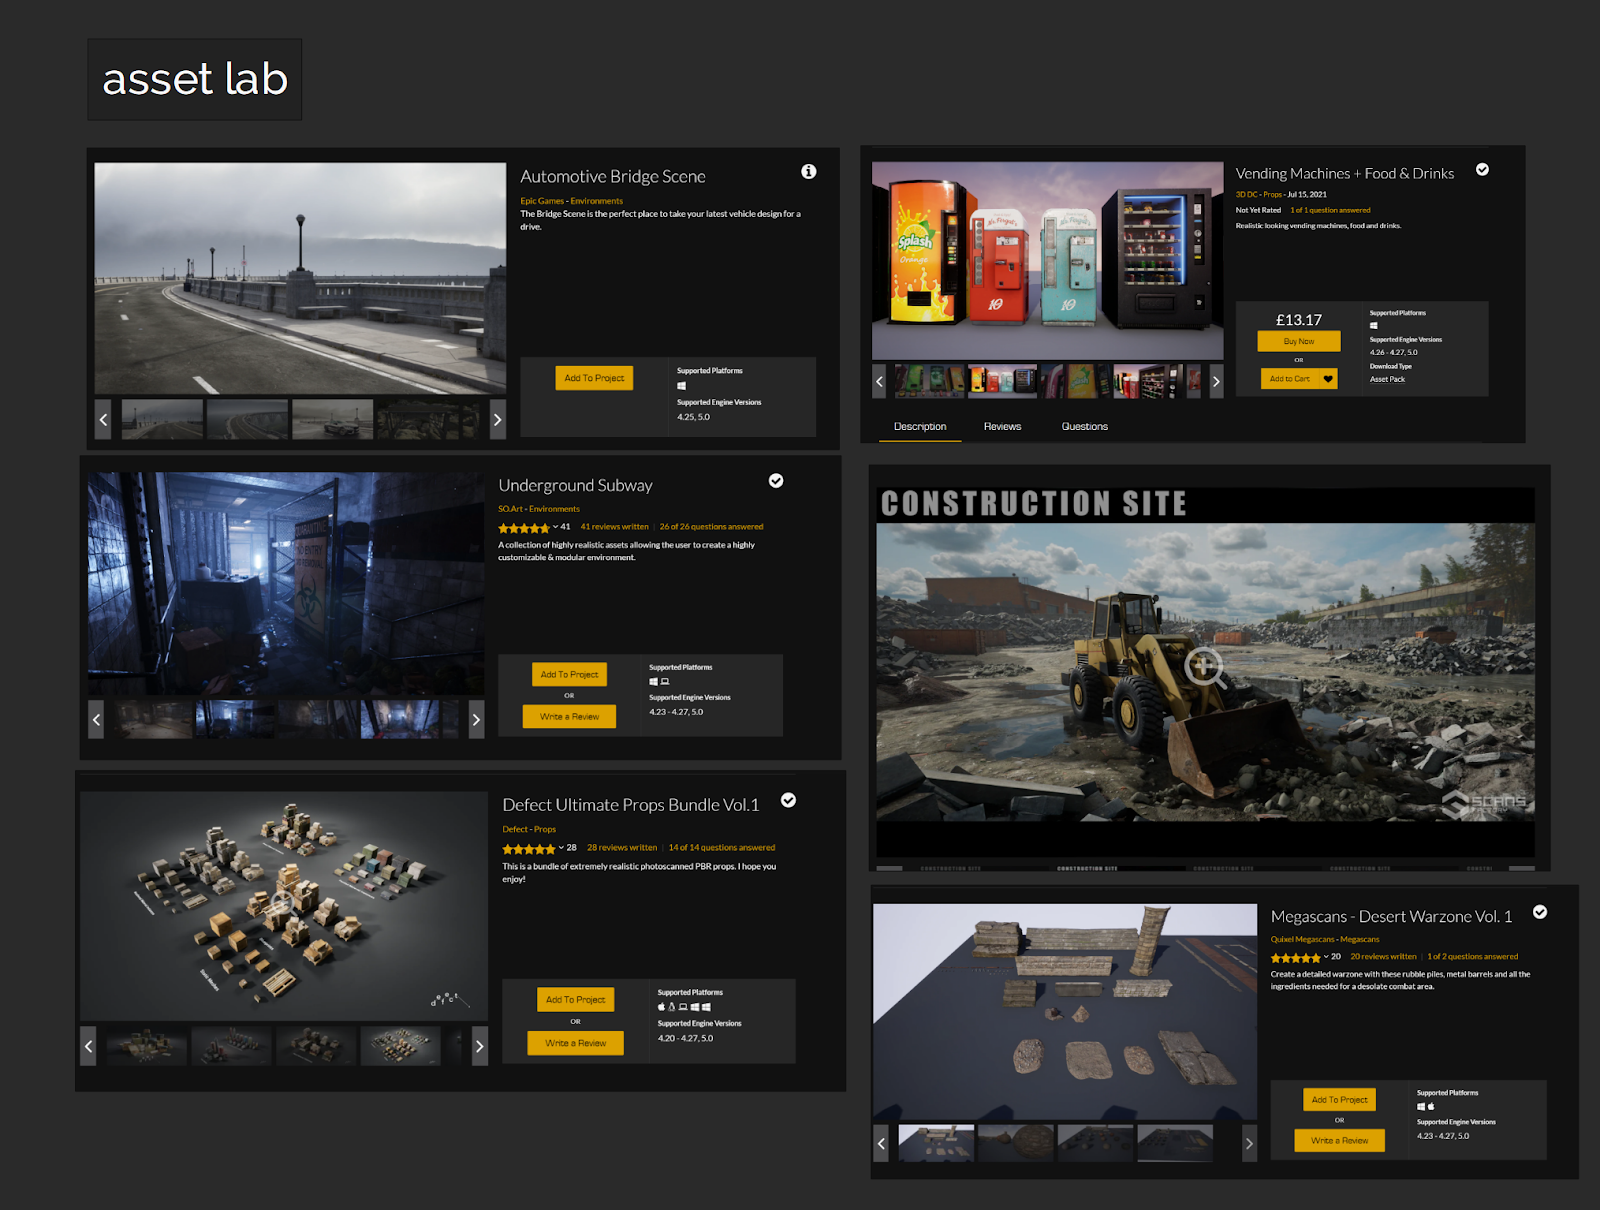
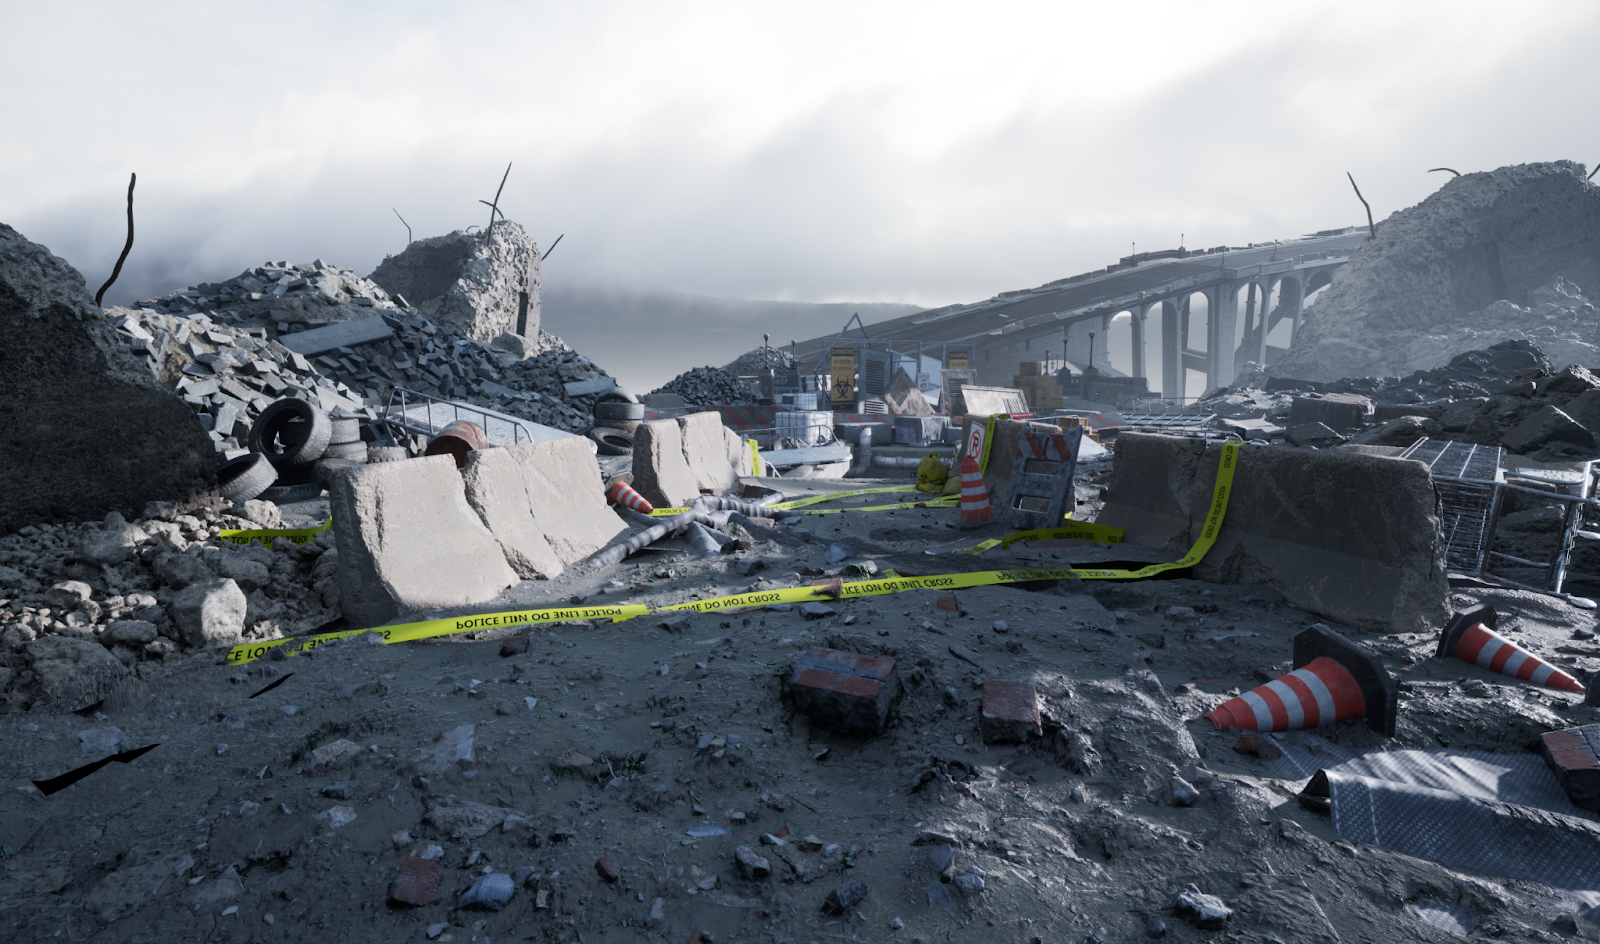
Usually, I tend to start my lighting design based on a ready-made level. In order to express my ideas, there are certain modifications I make in each level. Such as changing the glossiness value on the surface, or modifying the angle of the wall/ ceiling. This project is an exception, though I am probably far from a qualified environment artist, it doesn’t hurt to make an attempt to construct the scene based on a couple of asset levels from the Epic Marketplace and the Megascan library.
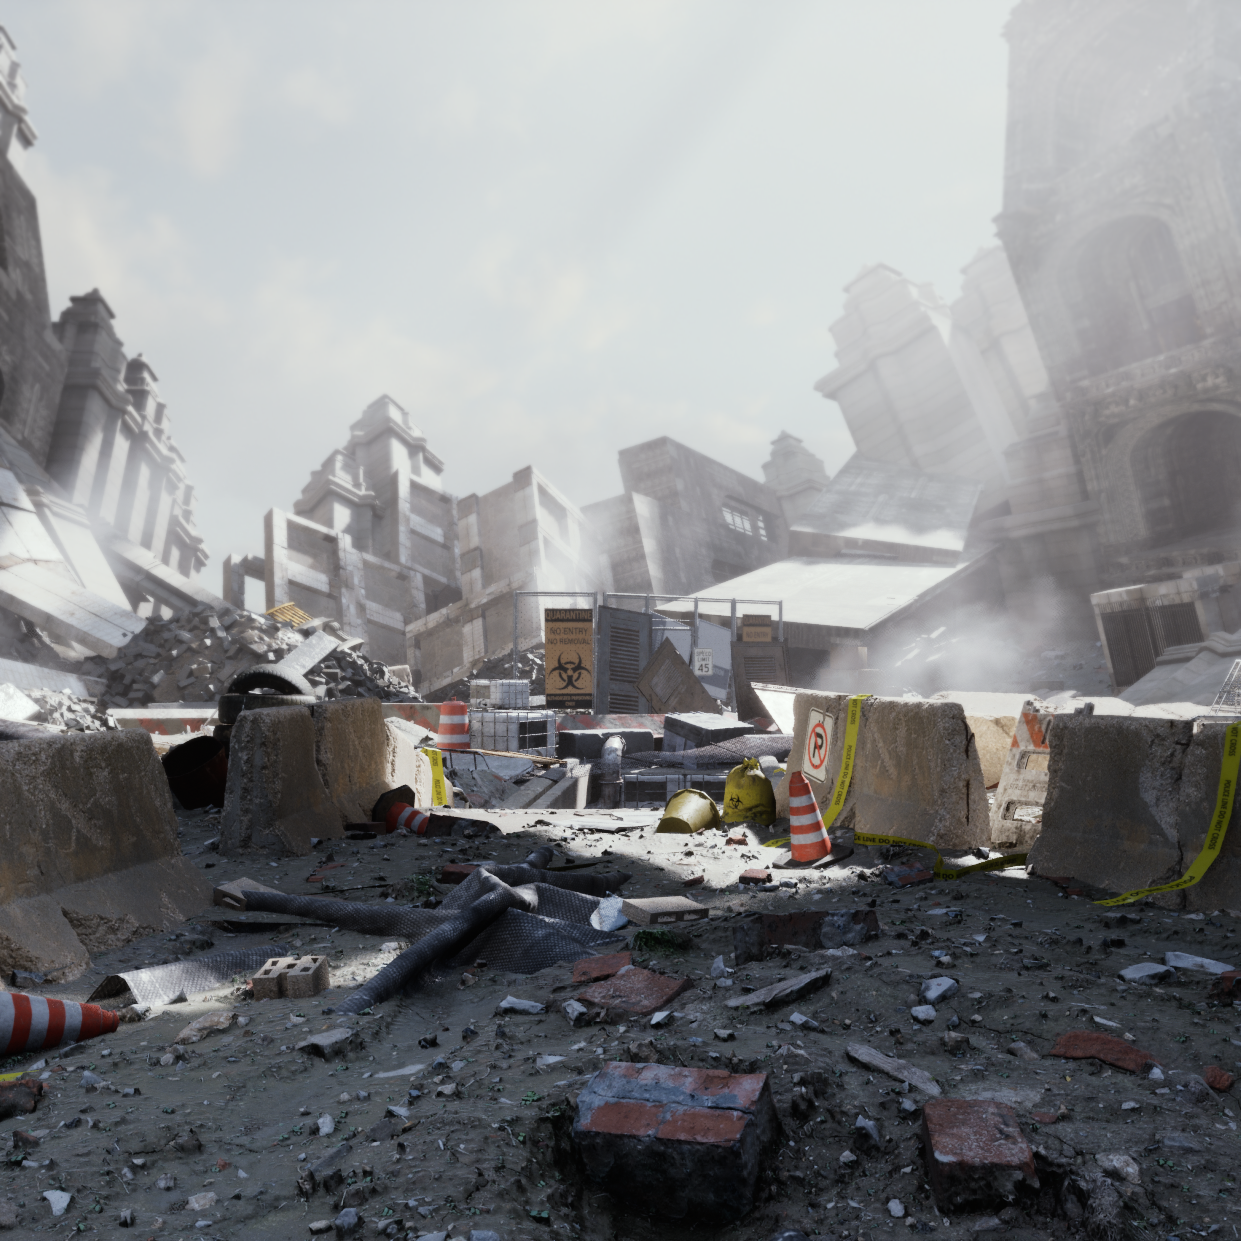
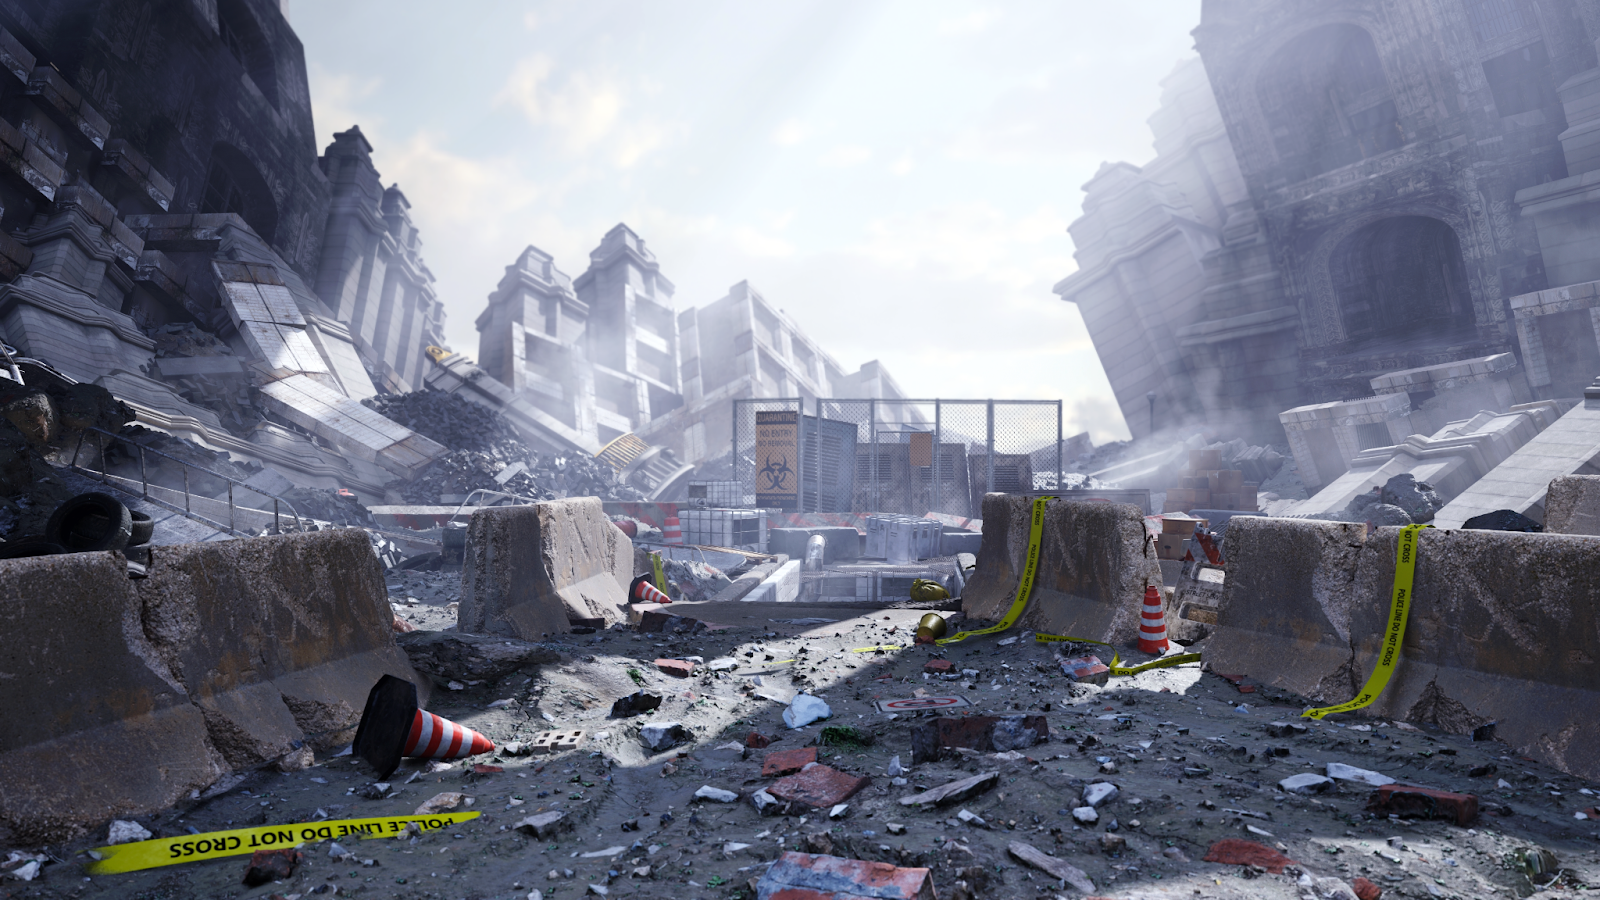
The best way to start is with reference, I saw Novelance’s ‘conductor’ on ArtStation, and immediately the city layout in this piece caught my eye. I had a rough idea that I would like to construct a city ruin, but would like to avoid spear the scene too much. On top of addressing the barren mood, I see the subway existing on the artwork could be a perfect opportunity to add some interior lighting vibe. As I planned this piece will be two pieces.
2. Building a lighting-friendly environment
After decide using Novelance’s ‘conductor’ as my key reference, the next step is to draft an asset shopping list. With the idea of scene wide open space in mind, my primary thought of the scene is a lot of concrete assets but without vegetation.
My initial Asset shopping list
However, any harsh shapes are usually not lighting-friendly. The ideal situation is to assemble a large surface and deliver the bounce effect under a fine level of gradience, meanwhile, the light rig should address the silhouette, shape, and volume well.
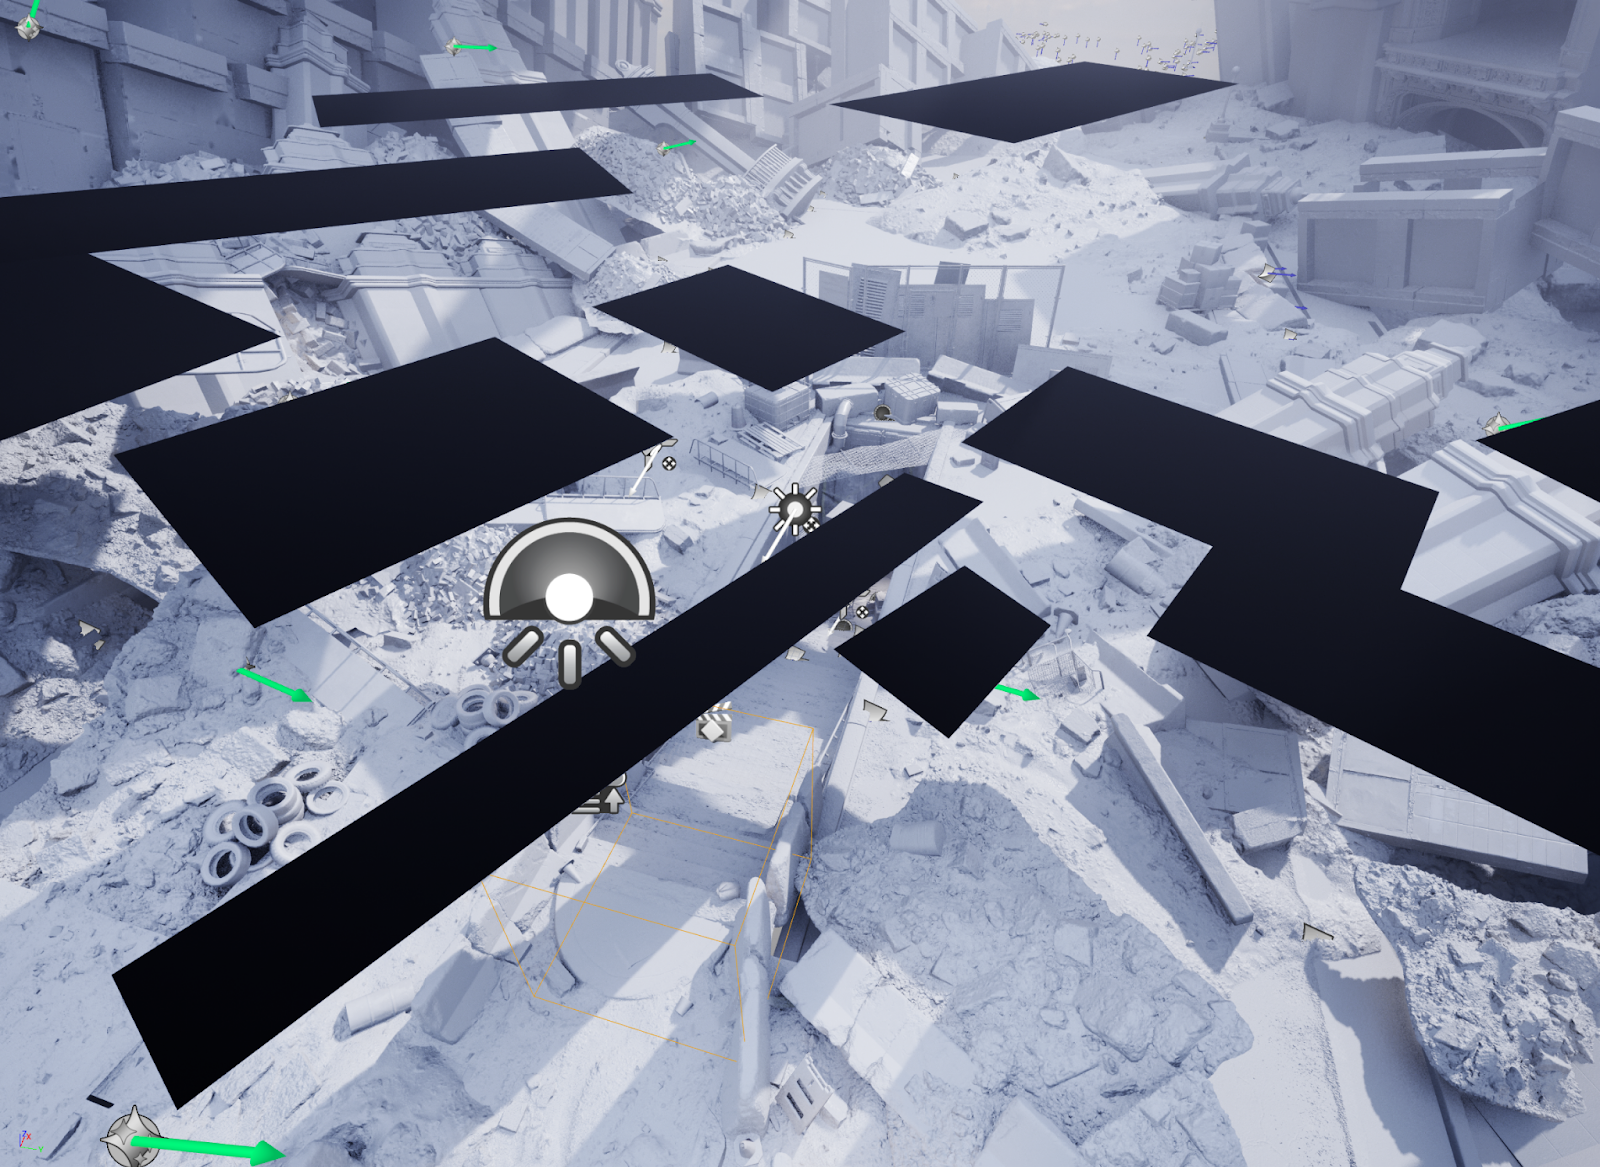
I tend to address the layout with primary shape only, it really helps me define the level of importance location-wise, and later the level of importance could align with the priority of lighting design.
Below are cubic shapes that I placed in the very beginning, and later replaced with the detail mesh.
Initial layout over view below
3. Contrast level
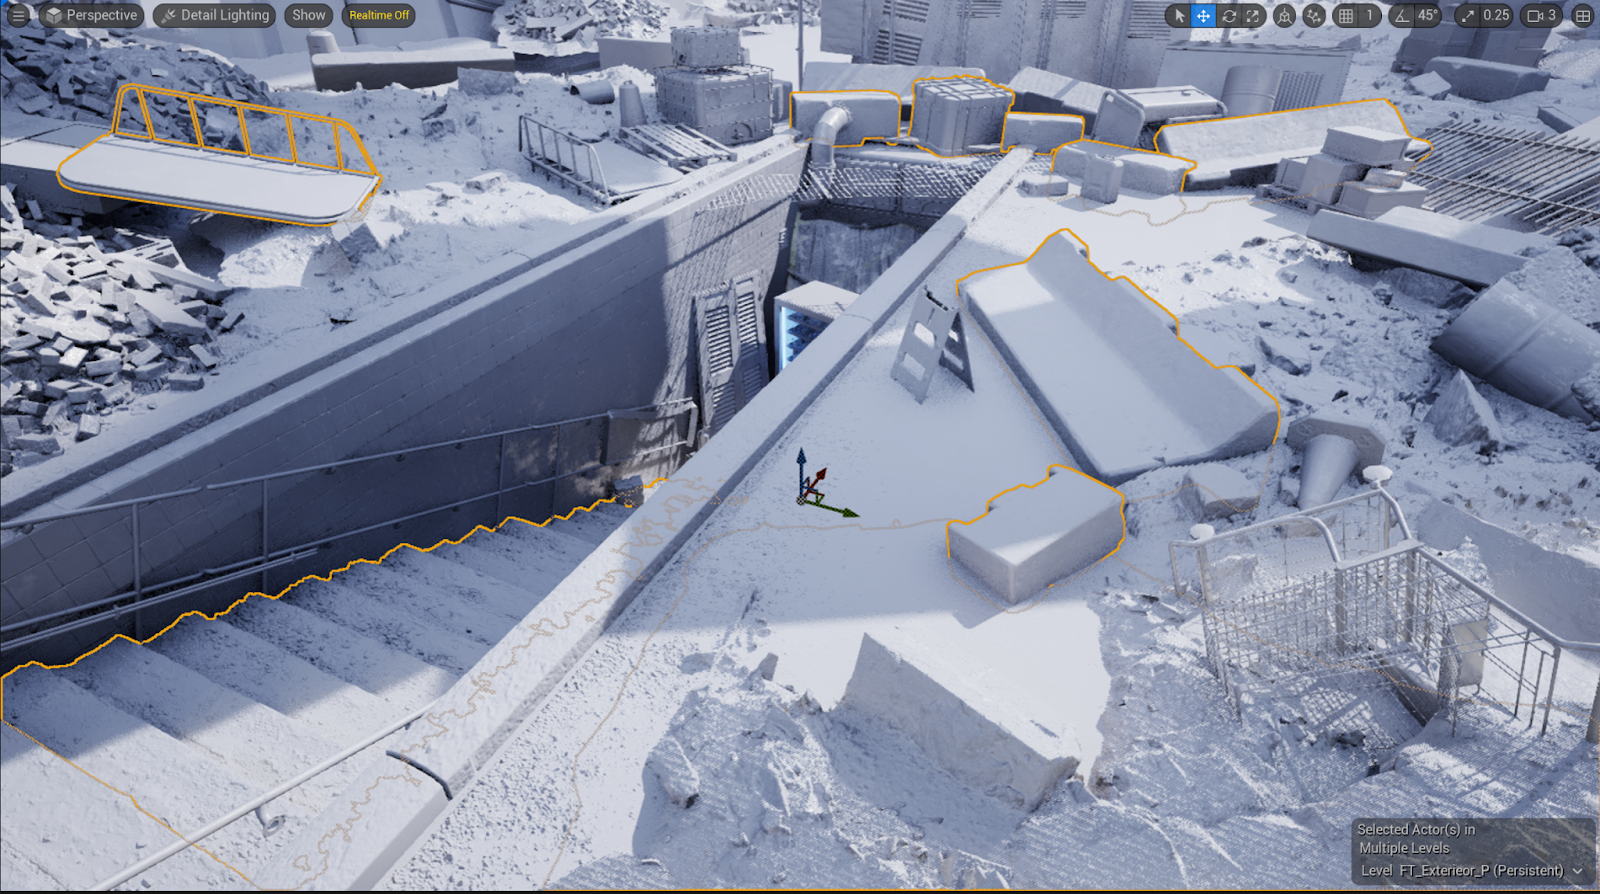
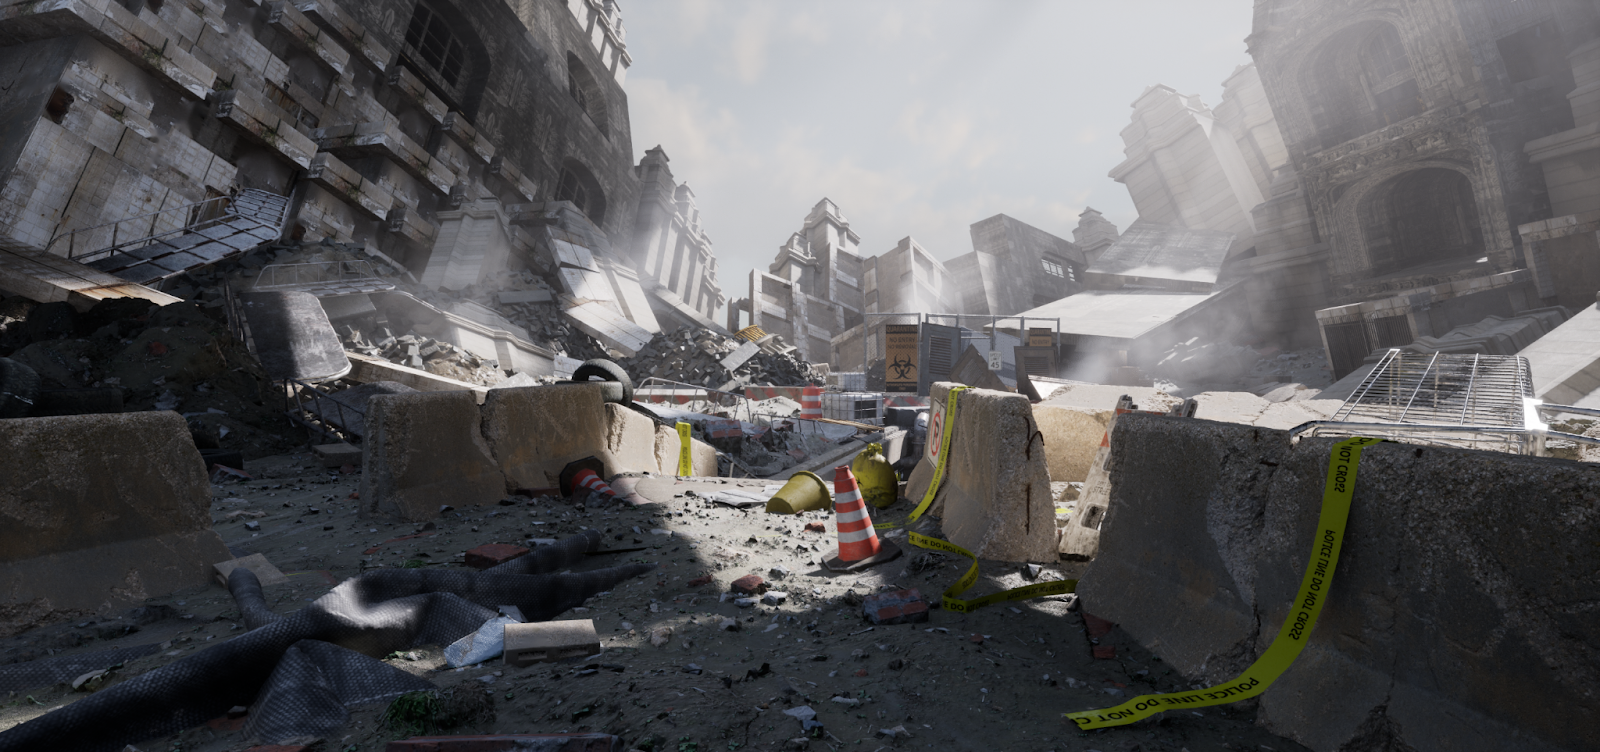
The motorway bridge from the automotive bridge scene comes with several modular meshes, I start
the initial level build-up from there. Following the key concept and updated the central area from a flat highway to a subway entrance.
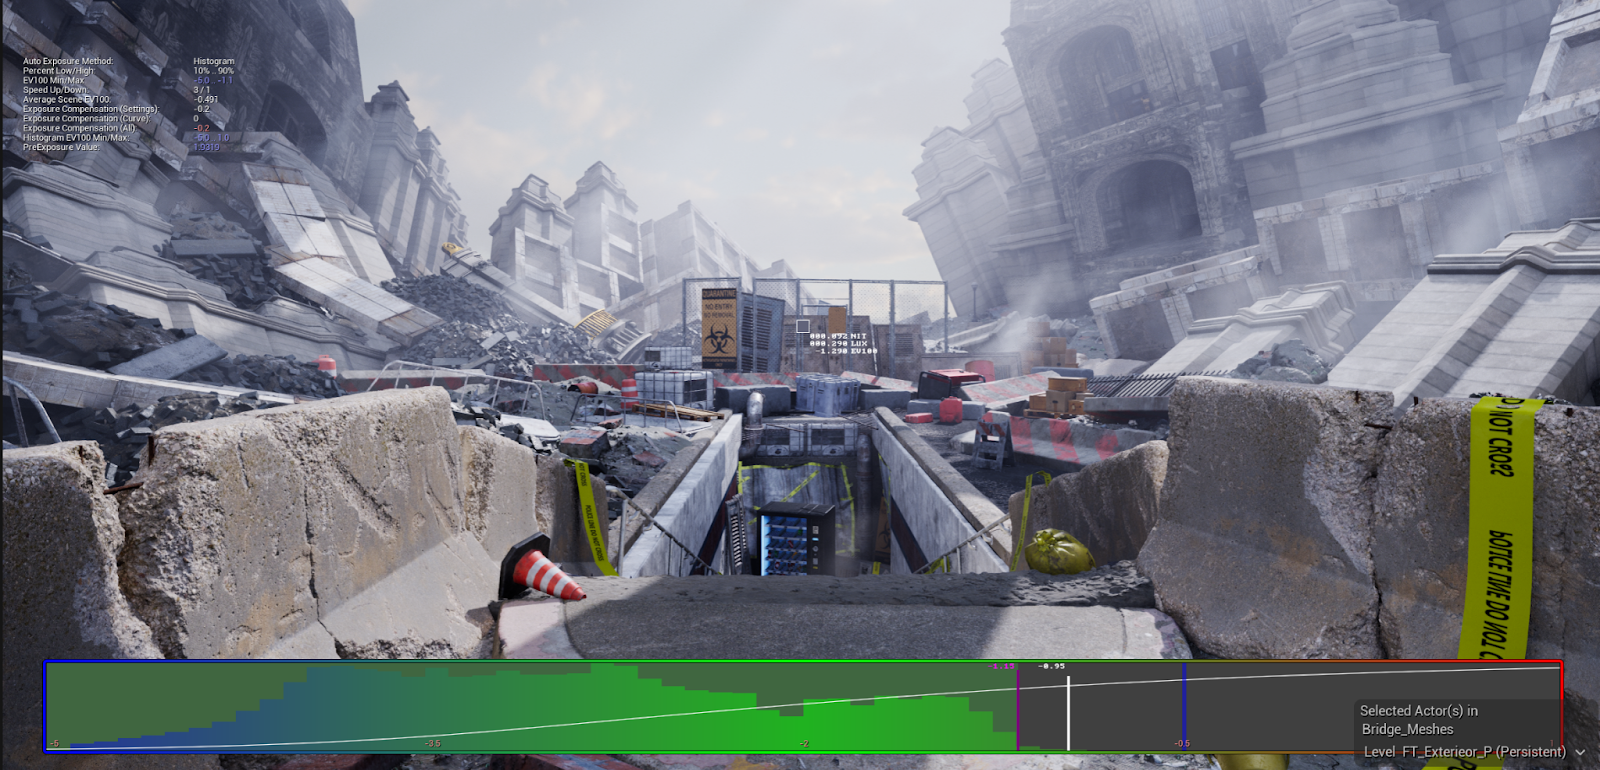
- A wide exposure range between -5 to -1.15

Setting up a wide exposure range to help reveal more detail with a dimmer interior light source is part of my plan for this scene. The benefit of a forgiving exposure range is not only for better details but also allows better control of depth of field without further exposure compensation on each cinematic camera. To elaborate on this point, a wider exposure range provides more choice of both aperture and shutter speed without the extra effort of exposure compensation.
Since I quote so many photography terms, here is a quick explanation from Canon.
Shuter speed/Aperture/ ISO and Exposure compensation explained
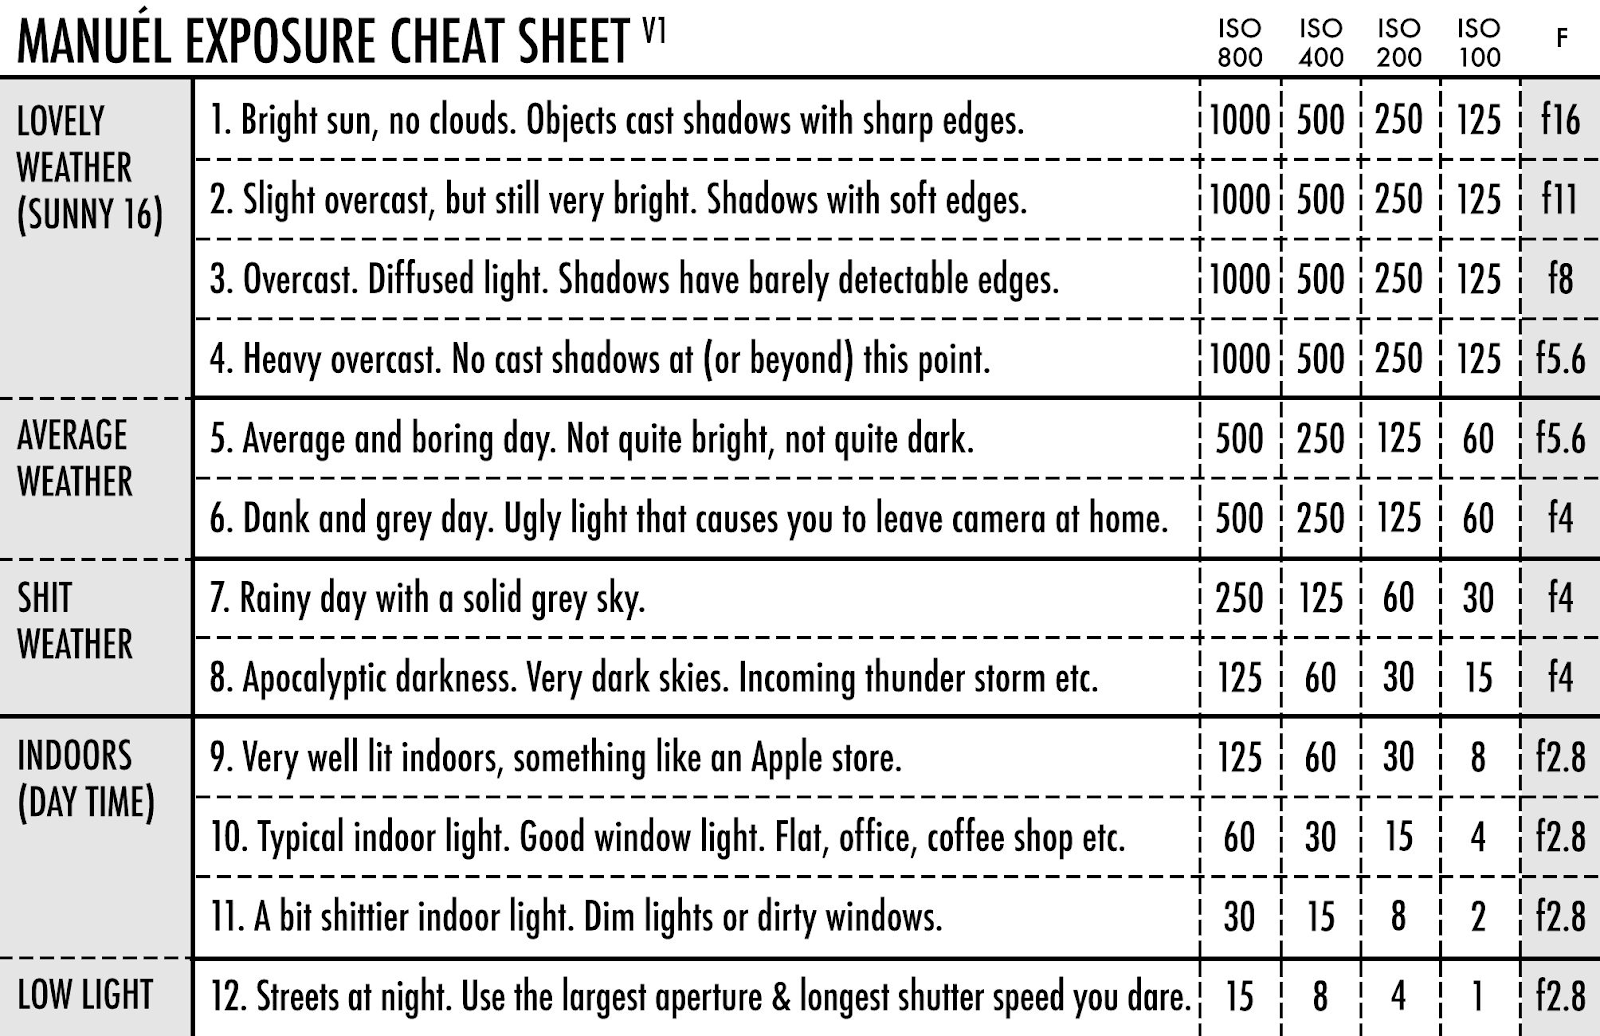
An earlier reference for film photography (35mm film). above
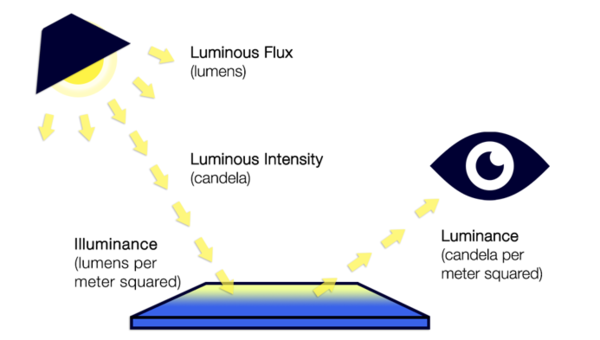
I prefer to make a firm and early decision on the luminance of each light source. It helps define the light ratio. Furthermore, the light ratio defines the contrast level for the entire scene.
Luminance and illuminance explained
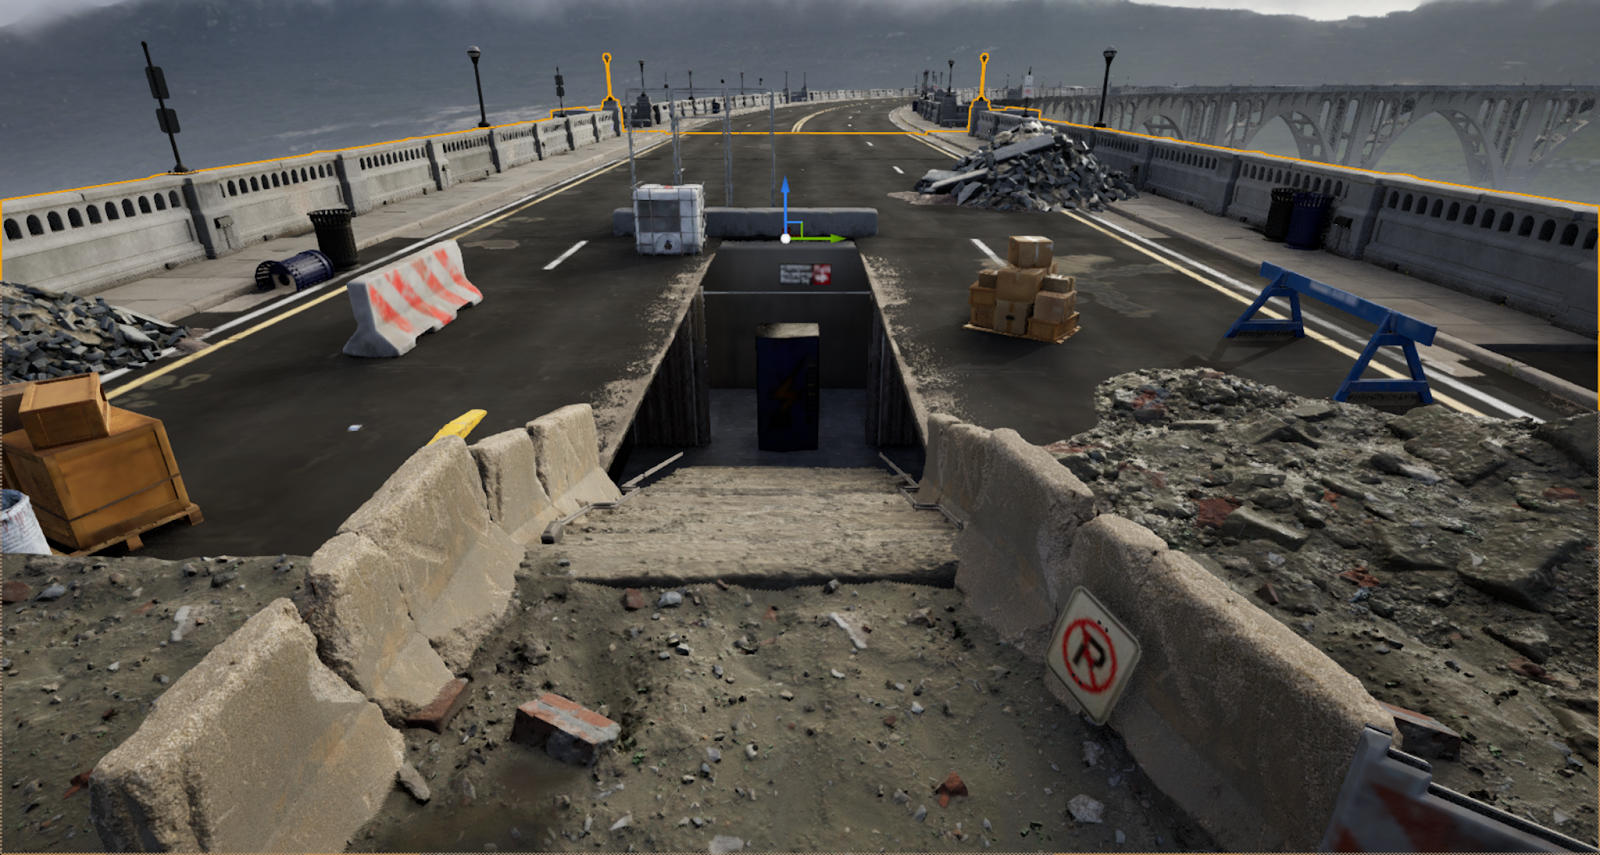
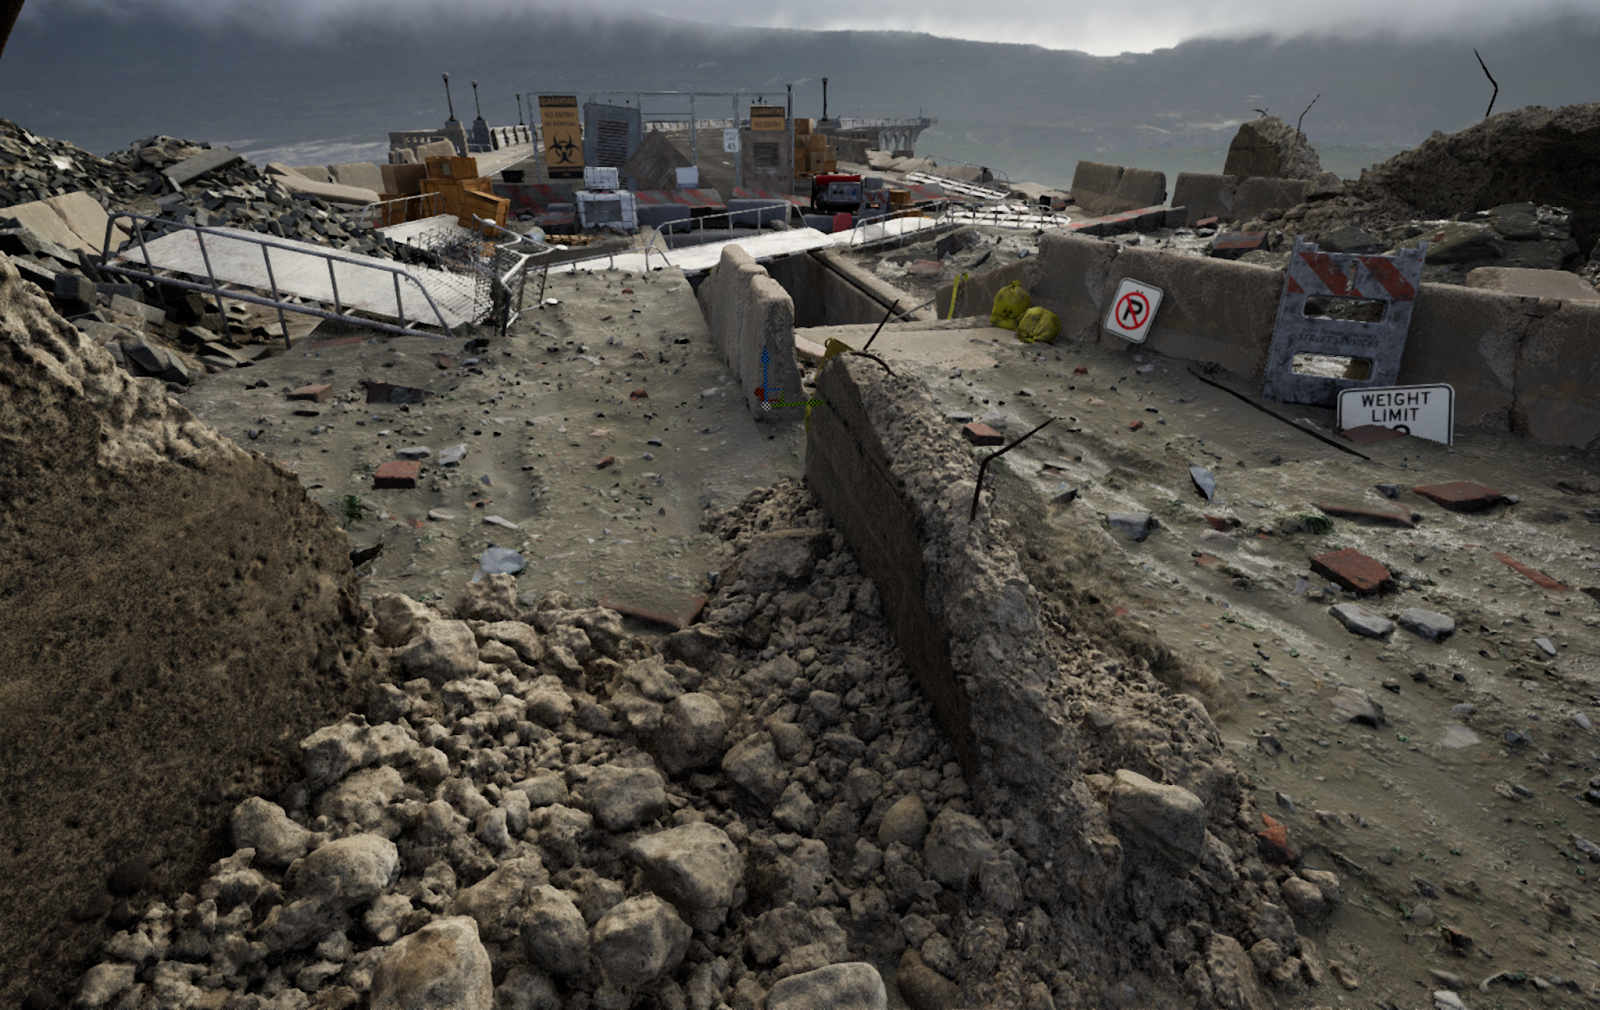
4. Mood and colour
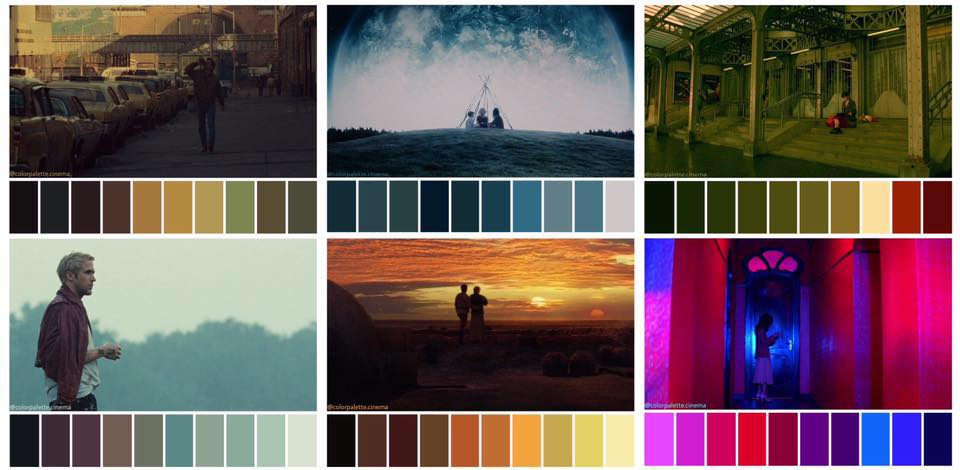
Reference picture from https://www.facebook.com/colorpalette.cinema/
Though contrast level is the most critical element in any initial lighting setup. The piece could not be finished without a proper expressive choice of colour and mood. This is also my favorite part of the entire creative process.
After years of personal work, I do have plenty of comfortable colour palettes that I could pick up, if I choose my usual slots, this piece could be finished nicely and easily. However, a conversation between myself and a close friend changes my mind, there are a few people I highly trust in terms of creative conversations, but none of those ever easily changed my mind if I was in the middle of my lighting design. The reason I mention this conversation is, it is probably the first and the last time that I actually take feedback and reconsidered my original idea.
The process is not easy, and I am fully aware this piece might not be well received as that is almost a cold water area where I tend not actively walkthrough. However since this is my personal work, and I do it fully for exercising my craft, express my ideas. Initially, this feedback from my friend makes me hesitate a lot. I was planning to set up a daylight look, however, 12 O’Clock lunchtime lighting in an open area seems really not that friendly for beauty lighting.
- Initial look with my comfortable colour palette 🙂
5. Look development
In general, I never do my personal project based on any popular topic/style, moreover, I never consider myself have a really good awareness about anything trending/ popular shows or games, except those floating adverts force me to know while browsing websites. And here I would like to come back to what I’ve mentioned at the very beginning of this article. My initial inspiration is 2D artwork, there are multiple ways to express similar visual style in digital art, especially while working in real-time 3D digital lighting. I know with a few tricks on colour/ contrast, the final look of this piece could be quite close to my reference without using the actual 12 O’clock flat 90 degrees sunlight.
And that’s where the ice-walking starts, maybe I do feel a bit of a challenge after that conversation with my friend. And this time I really do not want to ‘fake’ the directional light angle. Simply because I plan to introduce the fog effect into the scene later, and in Unreal Engine, the volumetric fog actually driven by both sky and directional light. In the end, this ice-walking decision is made partially due to my friend’s open suggestion, and partially due to the critical reason of volumetric fog. As a lighting artist using real-time tools, I truly believe that we are way passed the period to fake the final result due to tech limitations. In return, I believe there could be a better result if we leverage the tool and tech benefit the most.
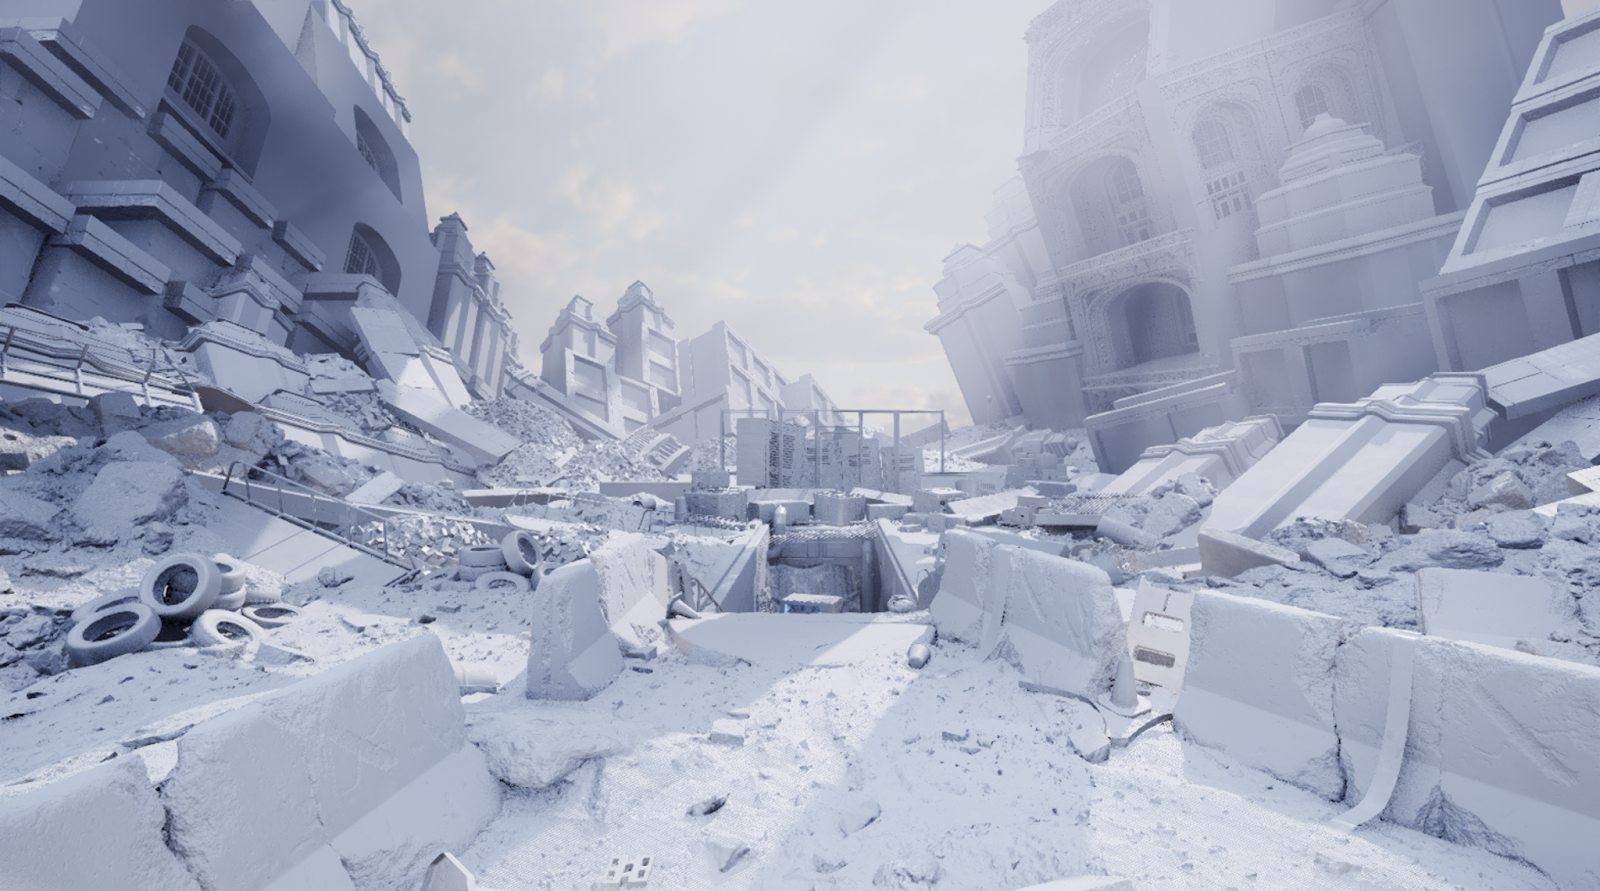
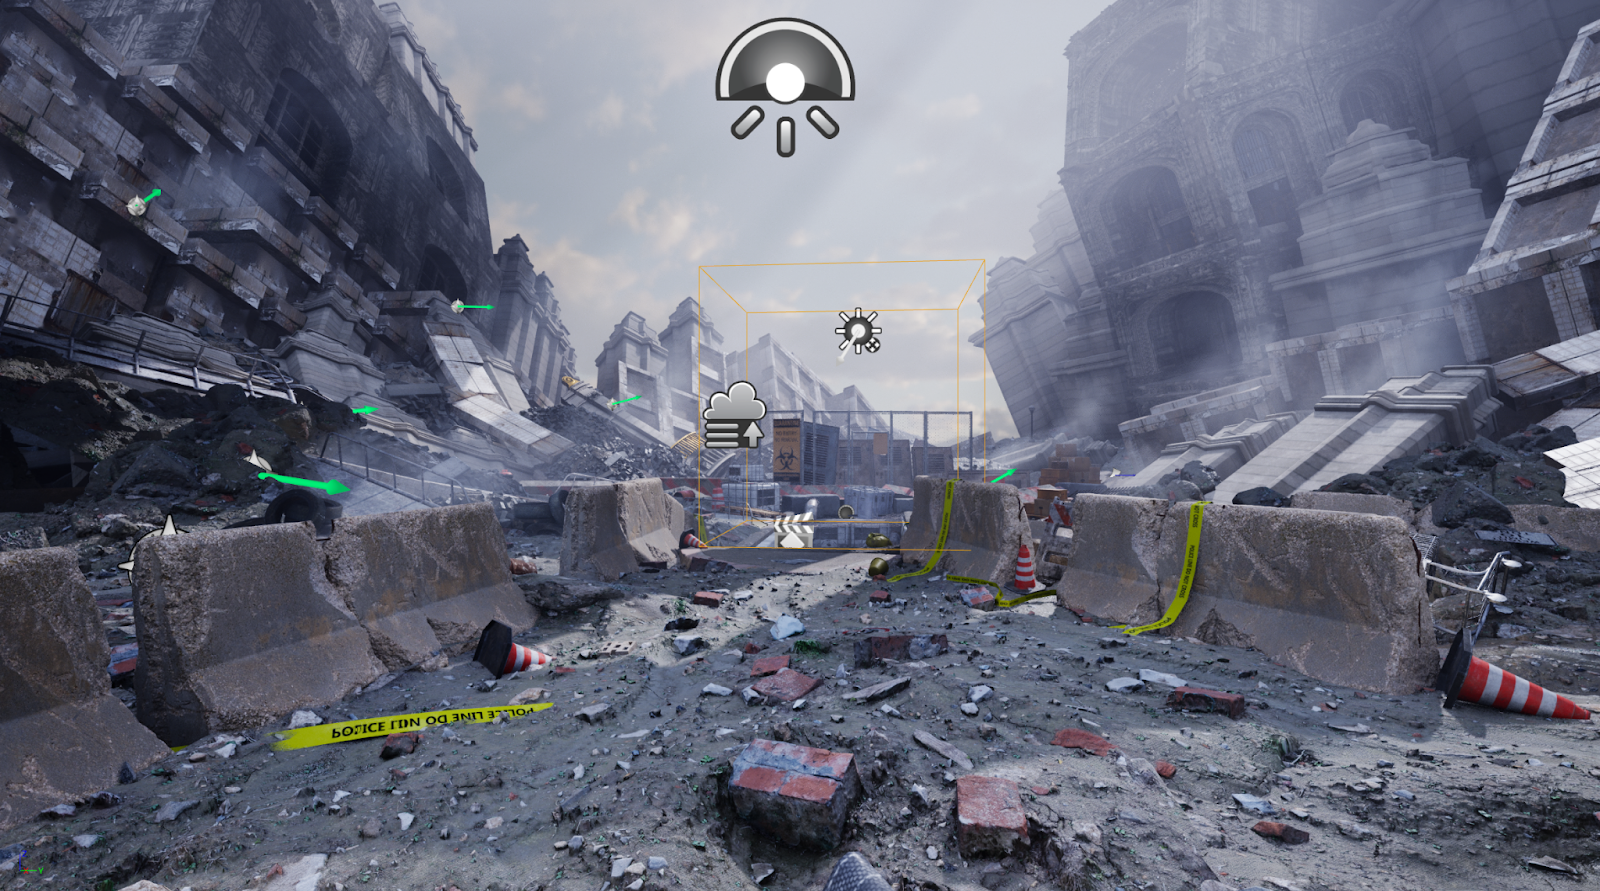
The scene is actually lighted with 1 dynamic skylight and dynamic directional light, as shown below.
To me, this is where I start enjoying the magic of Lumen in UE5. If I managed to define the correct exposure range, with the proper material and environment layout, there is no extra fill light required unless for gameplay purposes.
More ideas keep coming up after I made this decision of using an actual lunchtime lighting rig, I start to feel excited and challenged, and I foresaw there will be a lot of pain in revision ahead…
- The Beauty of Negative Filling
In real life, the light can be reflected or bounced in bajillion zillion ways, which is why photographers tend to avoid taking photos without setting up any negative filling to the object. Even if the extra effort of negative filling is not possible, at least a lens hood could help. The material of negative filling varies, it could be a high-quality velvet to a simple blackboard, as long as it does the job, the exact item being used as negative filling really does not matter.
In digital lighting, simply using a mesh or shadow plane should work.
- My negative filling in the scene
I remember how nervous I was while setting up the negative filling the first time. That Tuesday afternoon at the studio of my uni back in Chongqing in 2008. There were 4 of us first-year photography students trying to add more contrast to a still-life fruit set. The set is very small but a table lamp could easily make the entire scene bright. I and my classmates tried moving the key shadow plane around the table but it does very little, and the first negative fill practice ends up completely failing our team. Until one of us tried to use the dusty velvet and placed it on the table, the table surface was directly hit by the lamp before and created a lot of unnecessary bounce with noisy reflections.
We are suddenly enlightened by the beauty of negative filling. Since then I understand, lighting is not only about adding more fill light, minus the unnecessary bounce could also make the scene look better.
The purpose of negative filling in my project is primarily for creating a shadow area align with the target visual result.

- Initial negative filling test before/ after
6. It’s more than an eye-candy
As an artist, I love authentic style without any second thoughts. Nevertheless, the lighting in video games is not about creating a pretty but still image only. A fine lighting design in games should always address the target/ mission well. In addition, the design should serve the entire scene in a practical fashion on luminance while delivering the authentic element of the very universe.
It is my personal work, however, instead of an easy path of creating a pretty image, I prefer to use this piece to exercise a practical lighting design, which is close to the bar of an actual first-person-shooter level.
I liked this 2nd version’s result a lot, shown below. But in the end, I decide to not keep this look simply due to the negative filling does not make sense together with the open air. Perhaps this is one of the most difficult revision decisions I made for my own project this year. Because my goal for this project is not merely a beauty corner.
- Lighting Version 1, cinematic ready lighting but not flexible.

- Lighting Version 2, is less pretty at certain angles but offers better lighting conditions in most of the navigating/ gameplay areas for maneuverability. This area is defined by my camera animation which I will elaborate in the next chapter.
- An example of better navigation lighting with long-distance camera movement. There is no extra fill light added in order to shoot this cut.
7. Lessons learned from FPS projects
One thing I learned from many of my previous shipping titles is; no matter which look/style I am after, I will have to ensure the level is well-lit for navigation. However, I do not need thousands of lights to make a place well-lit. All I have to do is build up a reasonable relationship between my exposure range, the luminance of each lighting actor, and a good incident angle of my key light.
In this project, there are only 3 lighting actors, directional light, skylight, and volumetric fog. I purposely throw some ramp shapes in the scene and brighten the diffuse colour of the original texture. Those adjustments have boosted the possible secondary light bounce via Lumen to the maximum. Executing my initial light rig provides a lot of freedom on my polish path, which heavily relies on negative filling. As my key light provides enough lighting power, the negative fill can be more flexible, as there is less concern about dark corners.
8. Polishing, cinematics, and story-telling
As this is an experimental project, I was not even sure if I will present it as part of my portfolio until the 3 actor atmosphere lighting (skylight, directional light, volumetric fog. No more.) actually starts coming together.
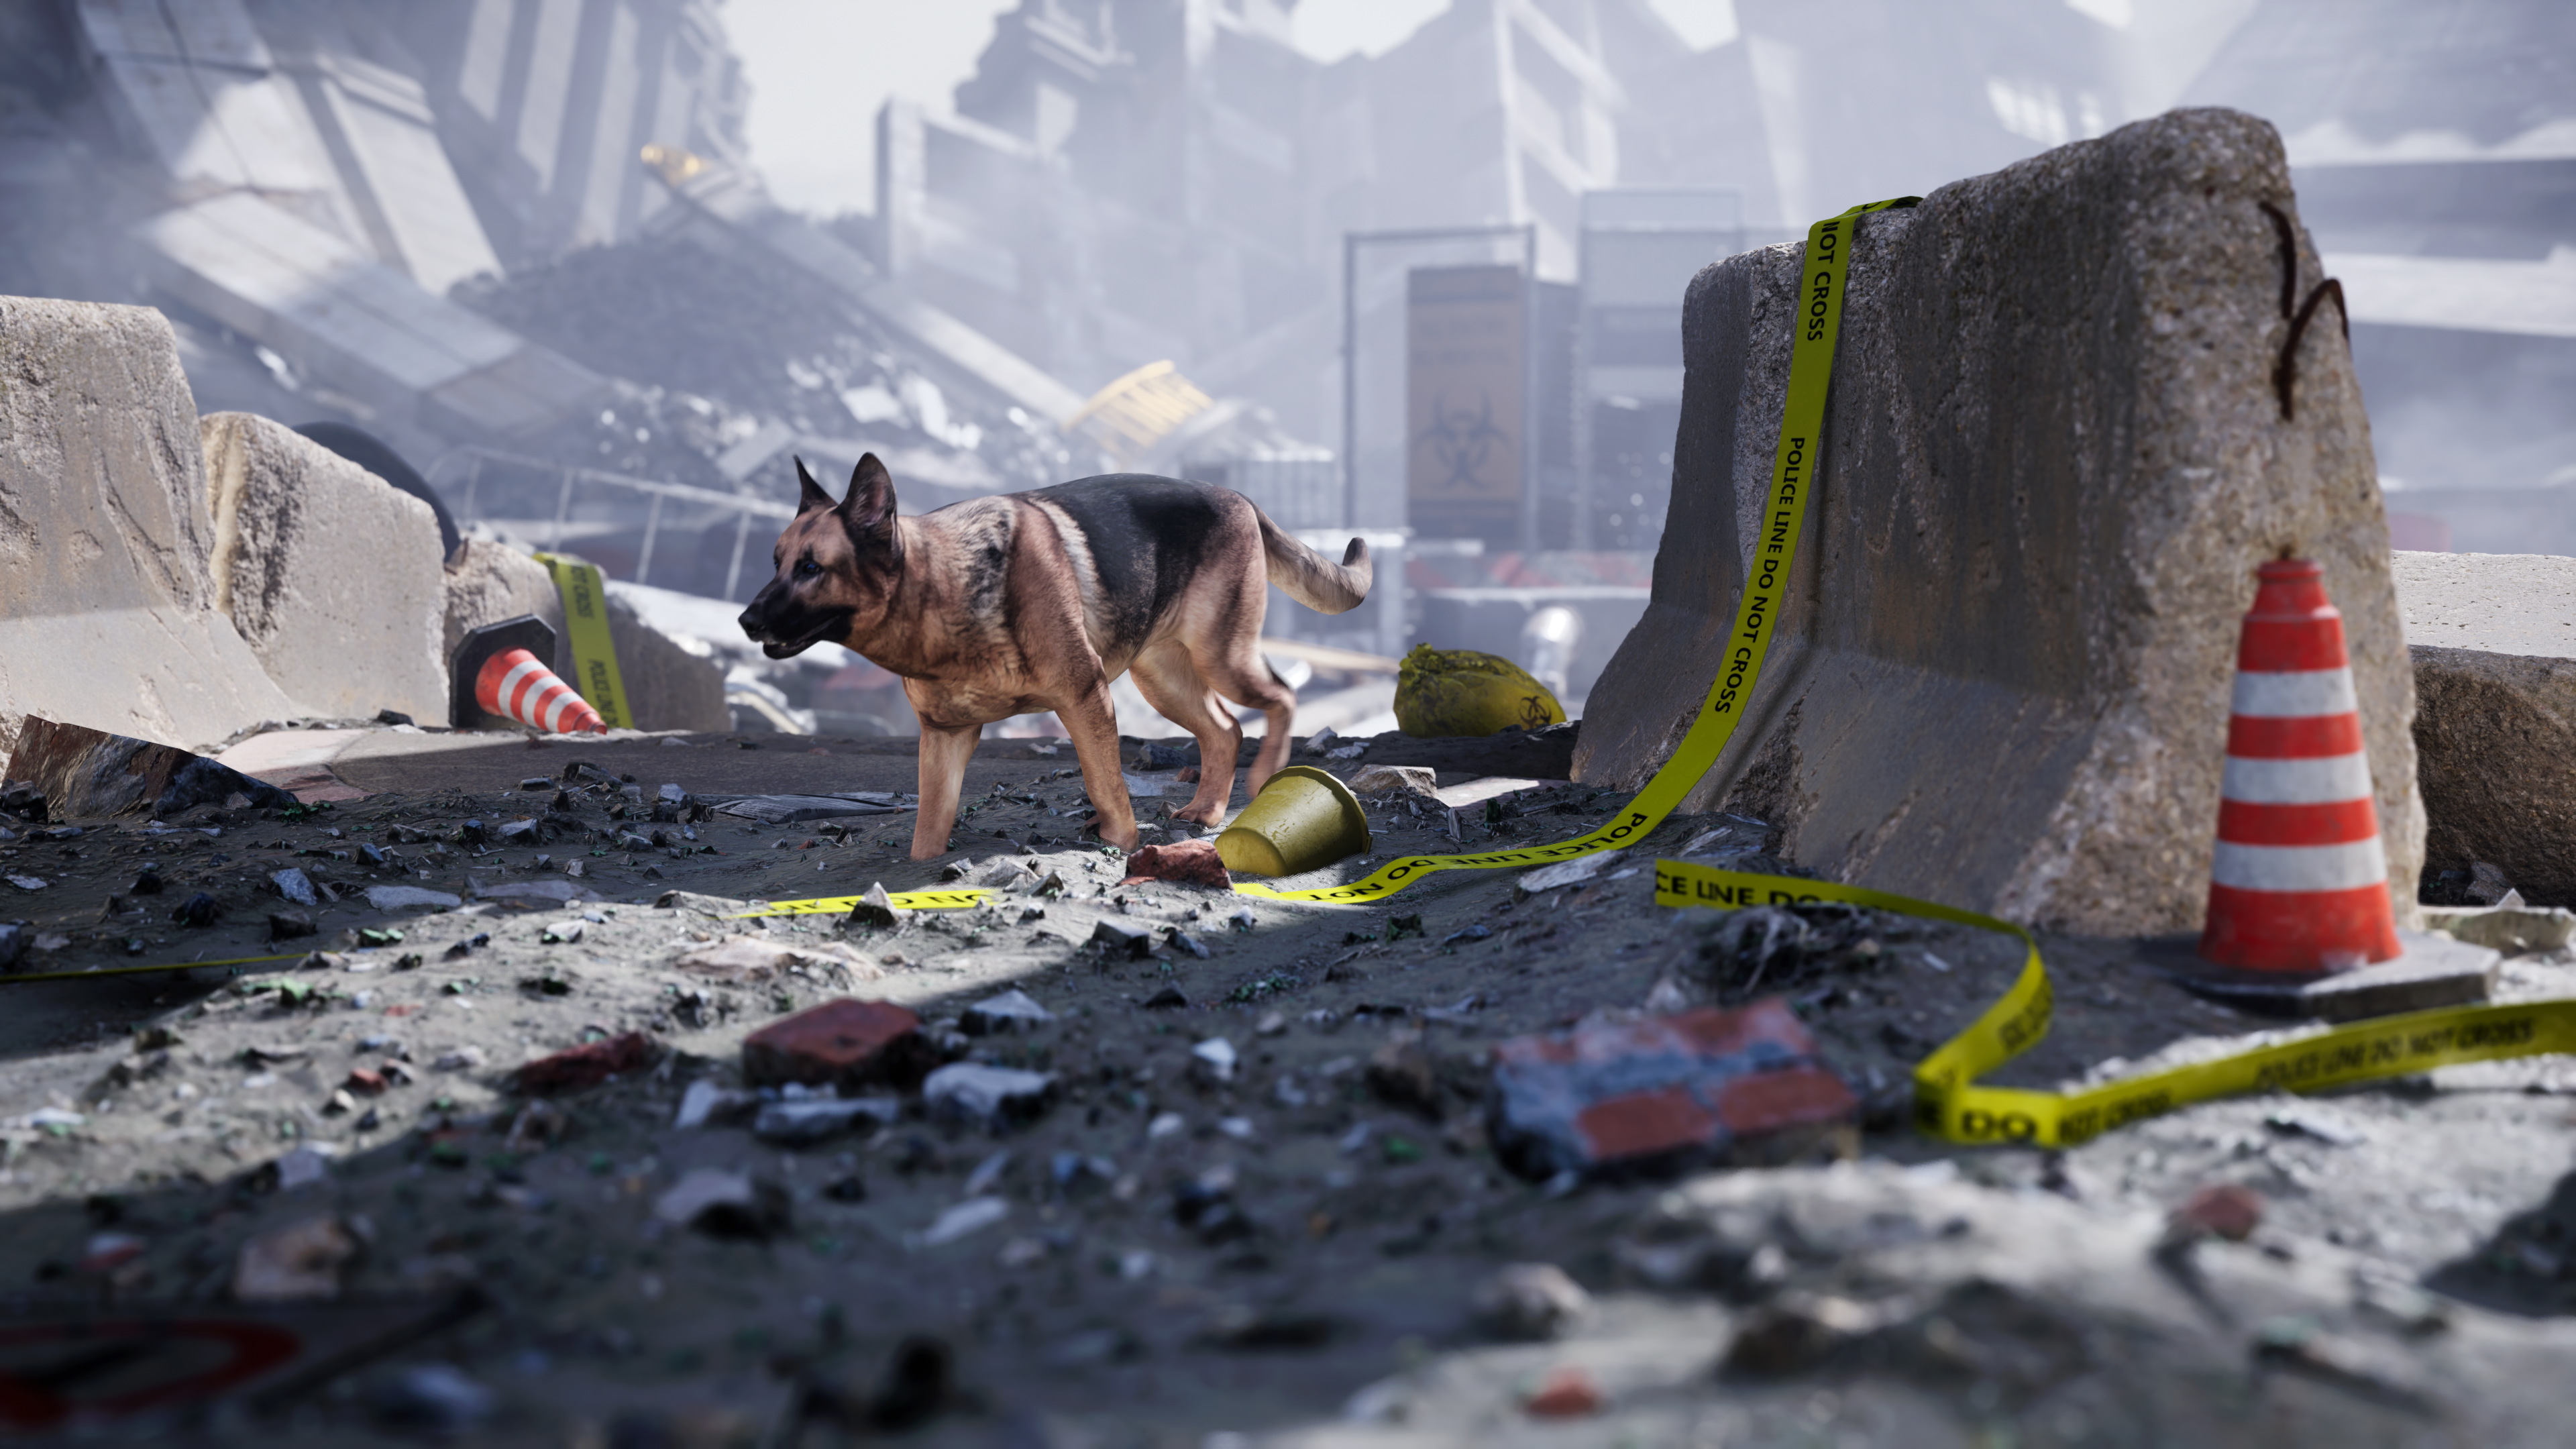
Character from Animalia- German Shepherd. Epic Marketplace.
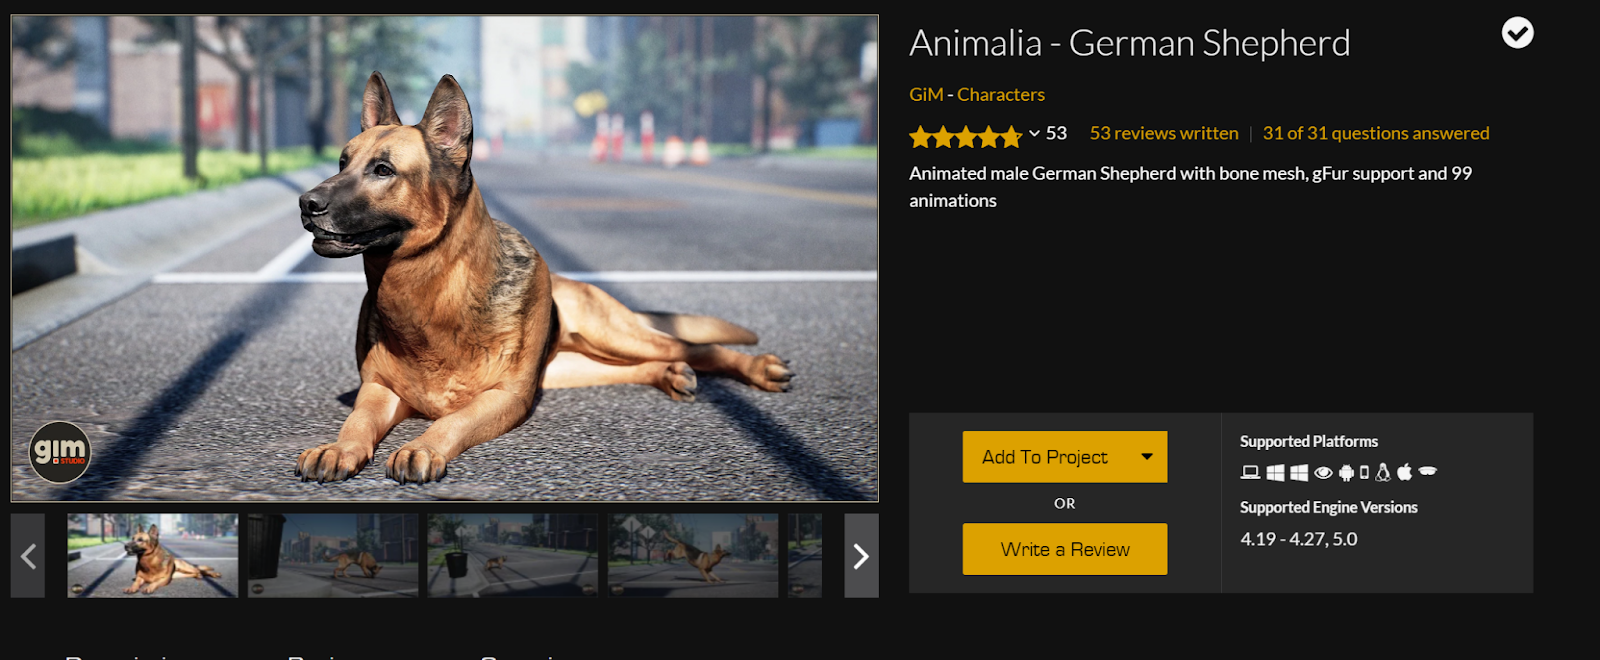
For now, the stage is ready, I need someone there to make the world alive. And the scene looks the best with a lower camera angle, a character short on height fits my camera angle the best. That’s how I decide to choose this German Shepherd as my character instead of any human character.
A character could add a lot more motivation into a scene, but also easy destruction. As this is an environment lighting design project, instead of doing a lot of close-up shots of this vivid character. I use it more as a guide for the axis of movement.
9. Some final thoughts
Usually, my post-production time equals the hours I spend for design and executing the lighting rigs. As different camera angles could request further aid of fill light, and key light direction adjustment. Due to I am after practical FPS-style lighting, it takes me way less time to set up each shot except for minor polish on the environment side. From here I start to enjoy the flexibility of FPS lighting style; I am able to move anywhere covered by my light rig, with minor adjustments of negative filling, each shot is completed in a very short amount of time, and each clip comes out with a visible consistency on contrast, color and exposure range.
In the end, this experimental lighting design becomes quite enjoyable to look back at, as a few of my lighting theory get tested and proofed. Thanks for reading and happy lighting.

很棒