An interior lighting study at London Museums
Recently, I have paid a visit at a few of London Museums. It happened that I have fond some interesting inspiration for my lighting design. Hence, I have decided to document some of my findings in this post. during my latest visit, I did not only admire the amazing artworks on display, but also paid close attention to the lighting design, which plays a vital role in enhancing the overall visitor experience of the museum.
For anyone who has visited my portfolio before, I trust that it’s not difficult to notice that many of my personal works are highly inspired by the aesthetics of the Victorian era. Furthermore, theatre and stage design was a subject I studied back in university. As a result of this early education, stage design remains a subject that greatly interests me.
If anyone is wondering why I am looking for real-life examples in an art museum rather than other places, the simple explanation is that museums and galleries are places that consider lighting as part of the visitor experience.
Thanks to the affluent collection at the V&A and the Natural Historical Museum, I was able to gather my findings on both topics with the aid of visual references.
An outsider’s view
As someone who grew up in a different culture, my point of view in this study is based on personal experience and observation. In this post, I will focus on visual development based on my own observations and interpretation.
In other words, this is far from an art history thesis, but rather a post about sharing how I gather and interpret artworks related to my personal interest. Furthermore, I will discuss how I incorporated those objective interpretations into my lighting design.

Highlight and shadow area
I took this photo displayed above at the Cast Court of the Victoria and Albert Museum (V&A) in London. Having lived in England for some time, I have visited the V&A many times, yet I still manage to find new inspirations with each visit.
The reason that brought me to V&A again for my last visit was to gather some reference on how to navigate indirect light into any interior space, creating a good balance between the highlight/accent and shadow areas.
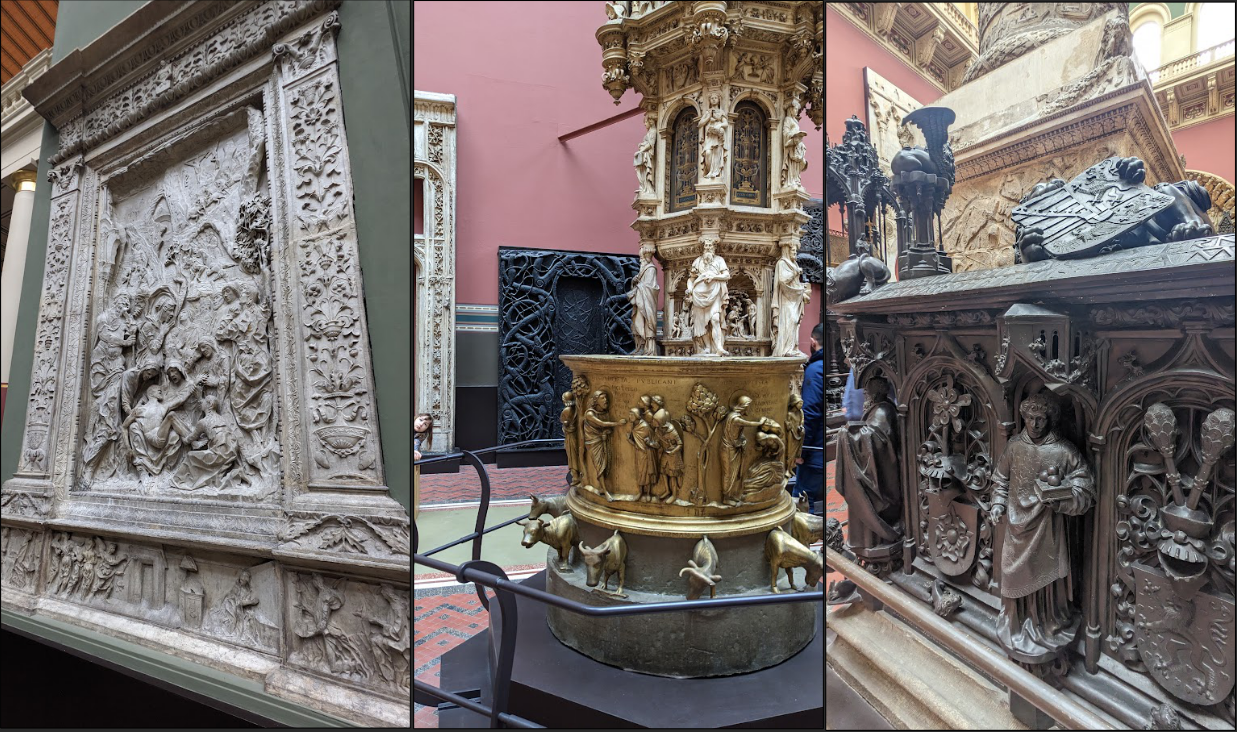
At the room 83 is the collection of Sacred Silver & Stained Glass, where I have found my first example of accent areas in lighting design.
Highlight or accent areas are intentionally lit brighter than the surrounding environment to draw the viewer’s attention to a particular object or area. This technique is commonly used in art galleries or museums to showcase a specific artwork or artifact. Highlight areas can also be used to create a sense of depth and dimensionally in an environment.
Below are some photos of the display case in room 83, those collections on display are boast with reflective shades and rich ornamentation. Each display case features a star-sky-like ceiling made up of numerous small light sources embedded within. This installation creates an area light source with a multitude of sparkling points visible through the reflection on each artifact.
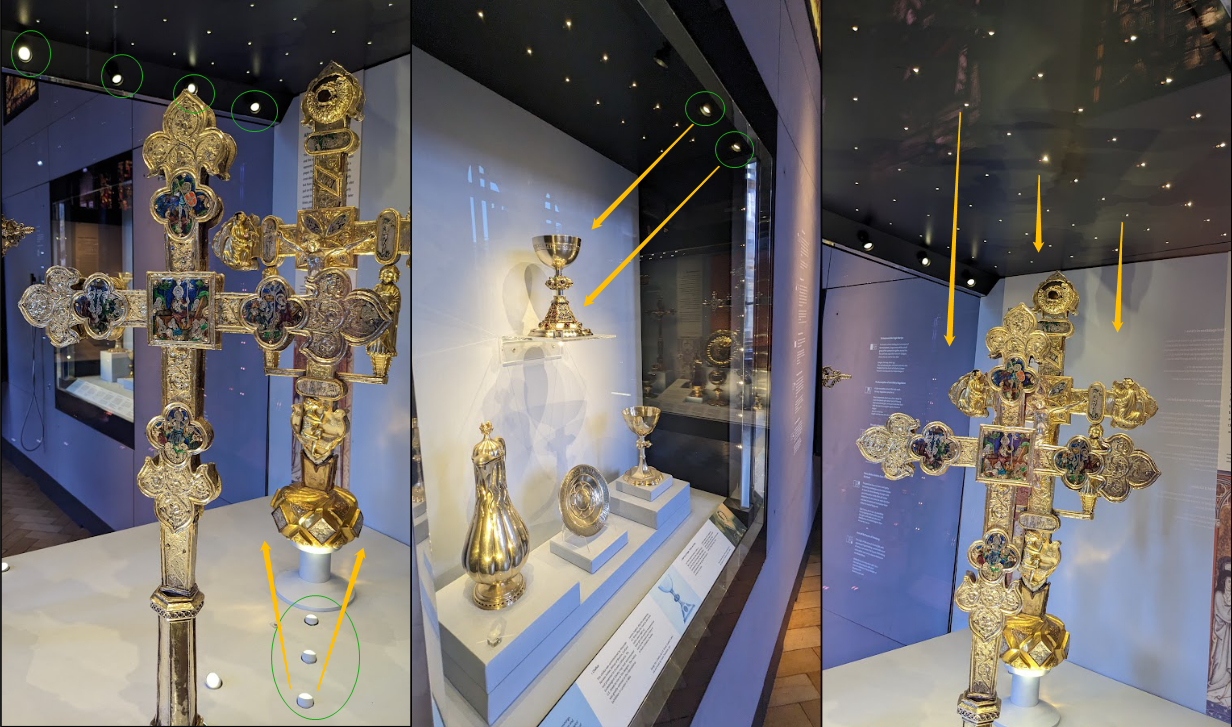
Sacred Silver & Stained Glass, Room 83, The Whiteley Galleries. V&A
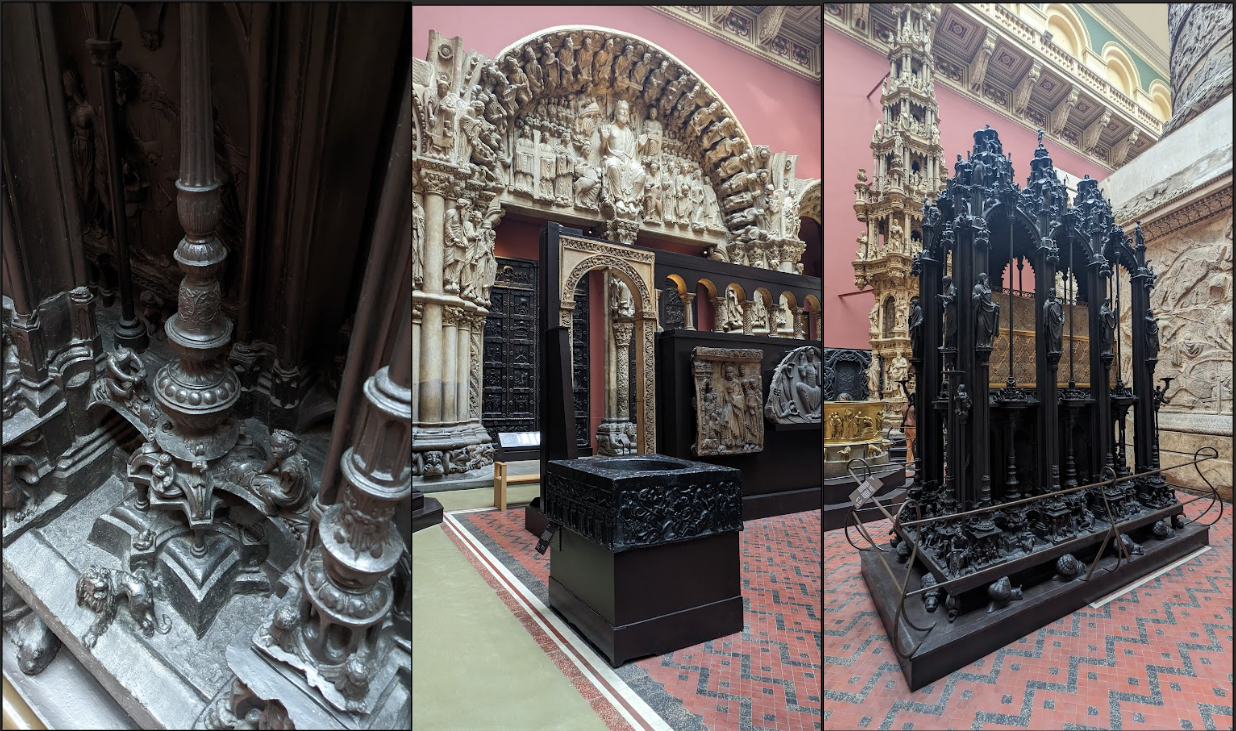
Several visible light sources have been highlighted in the photographs displayed below, providing practical examples of how direct light sources can be introduced into an interior space.
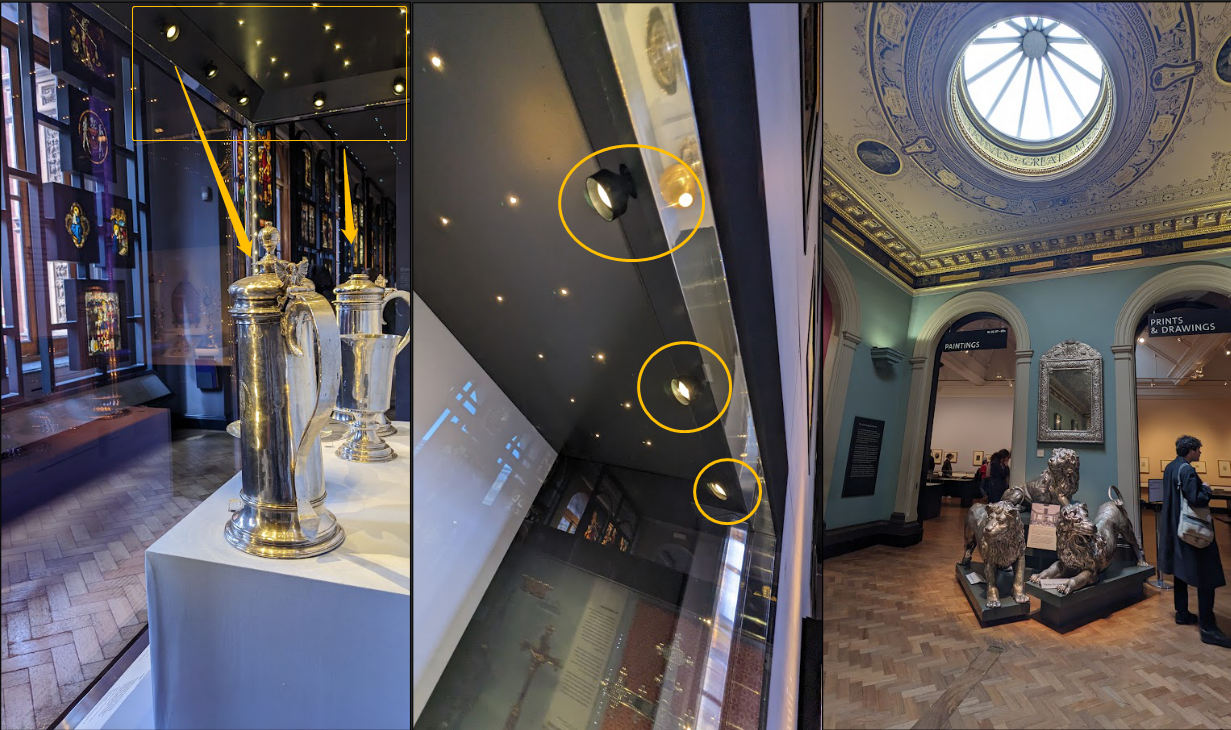
These display cases represent exemplary methods of creating highlighted areas, and serve as effective tools for bringing attention to specific features within a given space.
An unspoken rule of light source selection
I have lit many interior spaces focused on ornamentation in multiple personal projects. There is an unspoken rule I always follow while lighting.
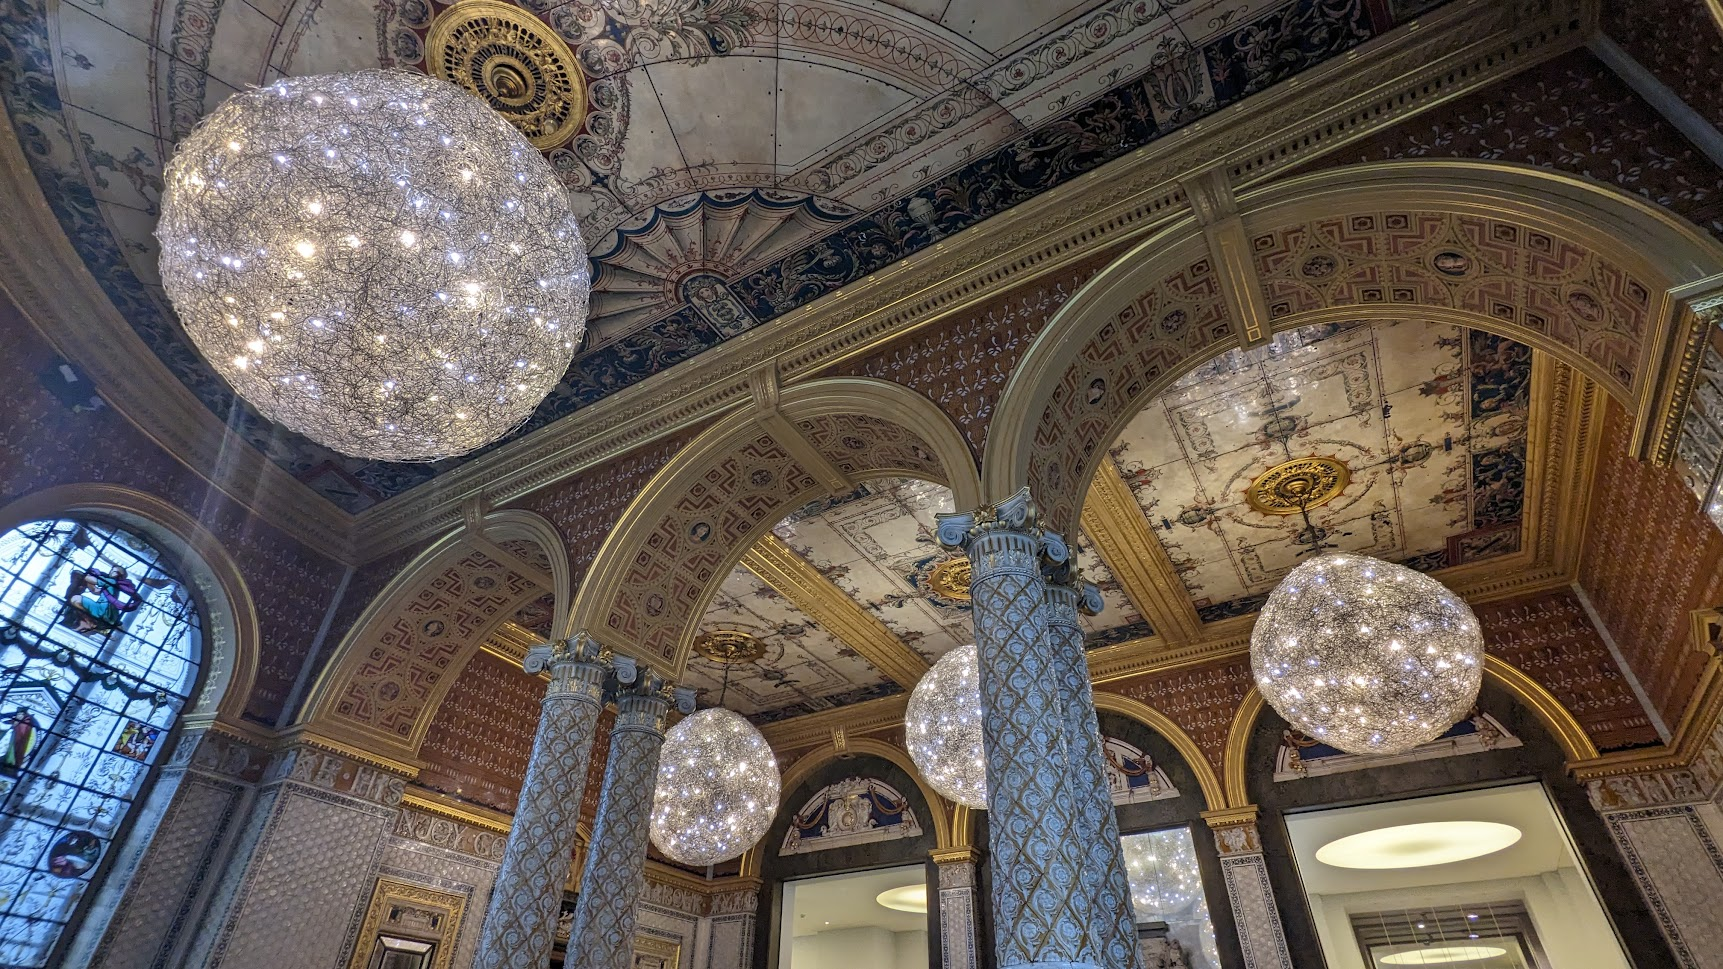
For surfaces with abundance of ornamentation, or endowed with a profusion of colors and shades, I tend to employ indirect but sound light sources that reveal the delicate splendor of the ornamentation.
For surfaces without decorative pattern, but build with metallic shade, direct light with a carefully crafted injection angle accentuates the fascinating effect of reflective surfaces.
To me, the relationship between the space and lighting always work as a mutual support and interaction. To achieve the best results, it is important to make the right decision when selecting the most appropriate light source for the surrounding environment.
Direct light source
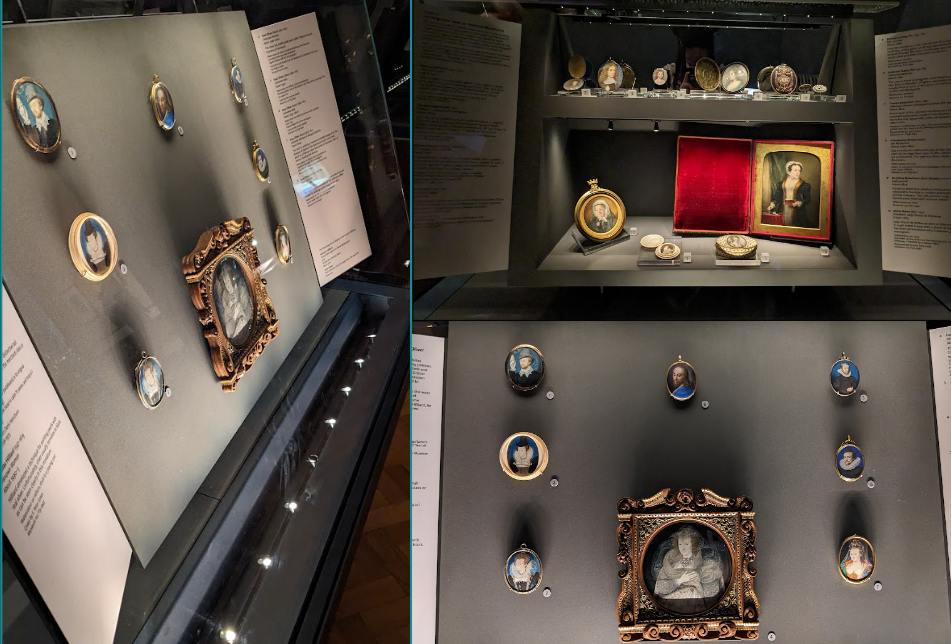
Portrait Miniatures, Room 90a, The International Music and Art Foundation Gallery, V&A
It was an absolute pleasure to take a closer look at the Portrait Miniatures display. The use of small spotlights created a stable lighting effect that accentuated the intricate details of the miniatures without causing too much washing out.
The display case above is no different from using a line light or a skinny area light source, which could easily be adapted and implemented into any 3D lighting design.
The tricky part is always the unnecessary shadows created by the light source itself, which are visible in the photos above. One essential fix to reduce unnecessary shadows is to decrease the number of light sources in real life. In 3D, we have the advantage of simply turning off shadow casters to solve the problem, without having to meticulously calculate the number of light bulbs needed.
However, it is important to pay attention to any artificial effects caused by light leakage from non-shadow casters.
Multiple light source with flexibility

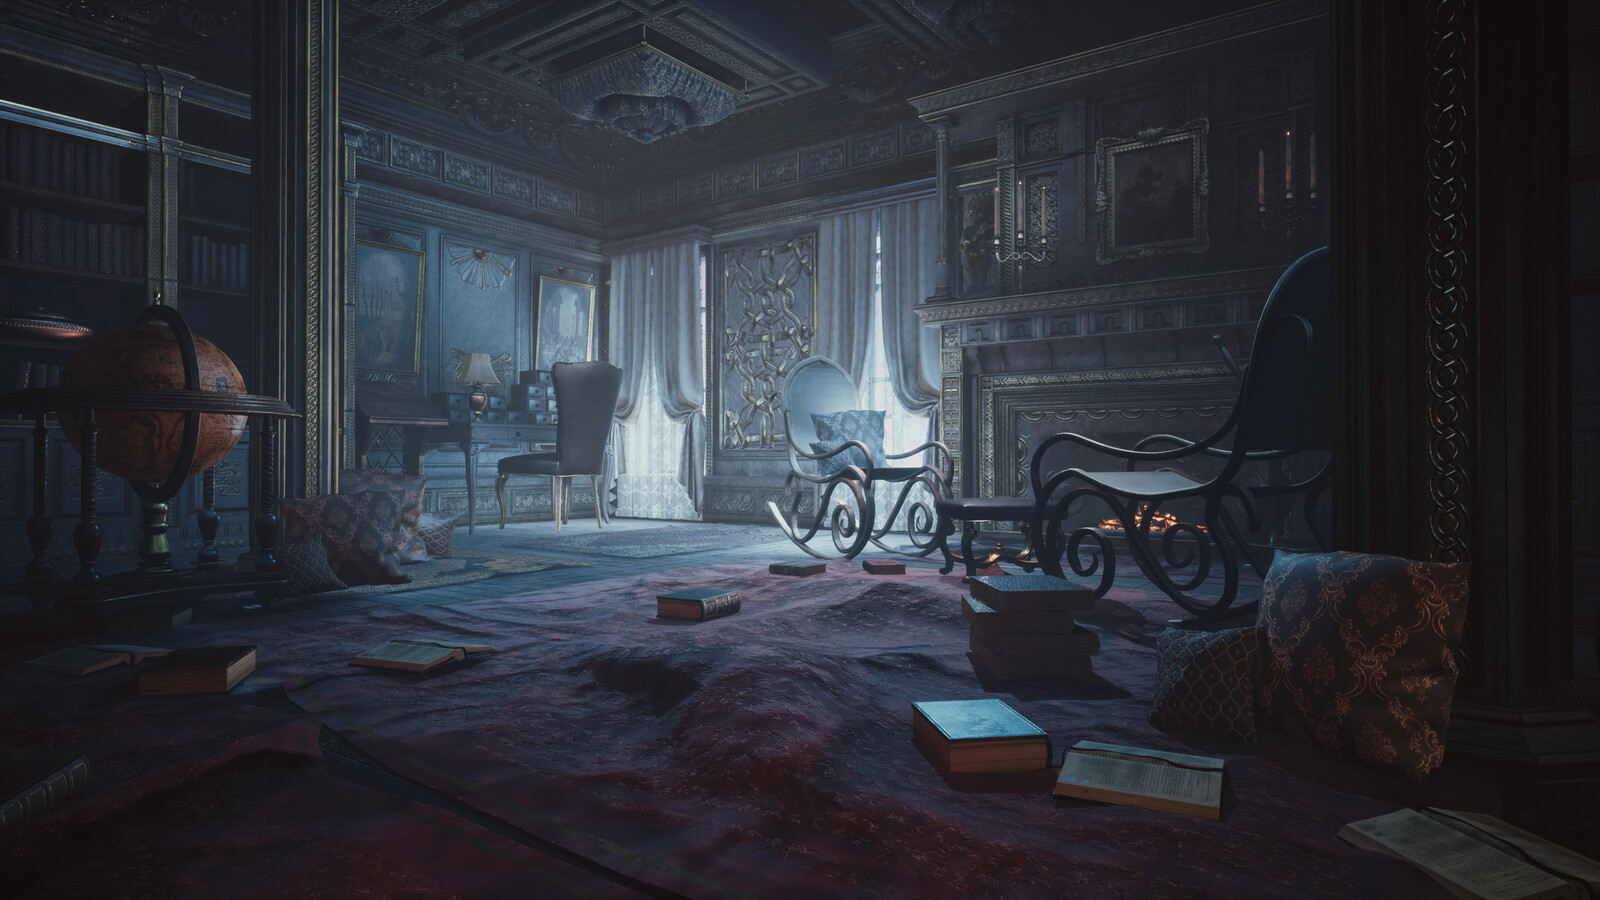
Paintings, Room 81, The Edwin and Susan Davies Galleries V&A
During my visit to the gallery, I observed an intriguing detail in the painting rooms whereby the spatial design allowed for the introduction of multiple light sources, adaptable to weather and lighting conditions. This consideration in the design serves to enhance the viewing experience and facilitate the perception of the artwork’s visual qualities.

The photos above depict other installations and interior structures within the gallery that featured multiple light sources.
The painting rooms at the gallery have window blinds to regulate natural light, as well as adjustable artificial lighting fixtures. Both the blinds and the fixtures can be adjusted to different angles, providing multiple solutions for different time of day.
To me, this multi-solution lighting design concept makes these galleries a truly inspiring space. It allows for a range of lighting possibilities to be explored.
Skylight

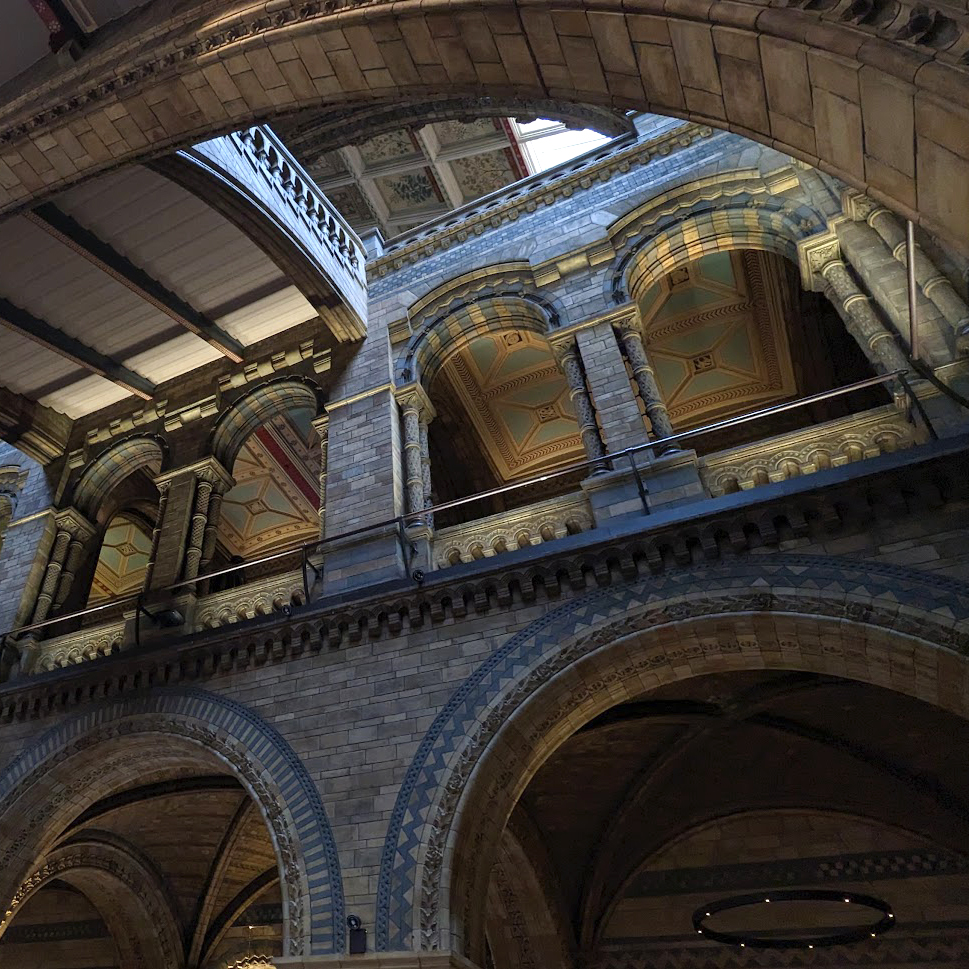
I came across another fine example of the use of sky light in a large interior space. The photo above was taken by my in the lobby of the Natural History Museum.
The photo speaks for itself, showcasing a spacious, viewer-friendly interior with excellent visibility. There are not many direct or visible artificial light sources, which can sometimes lead to an uncomfortable viewing experience.
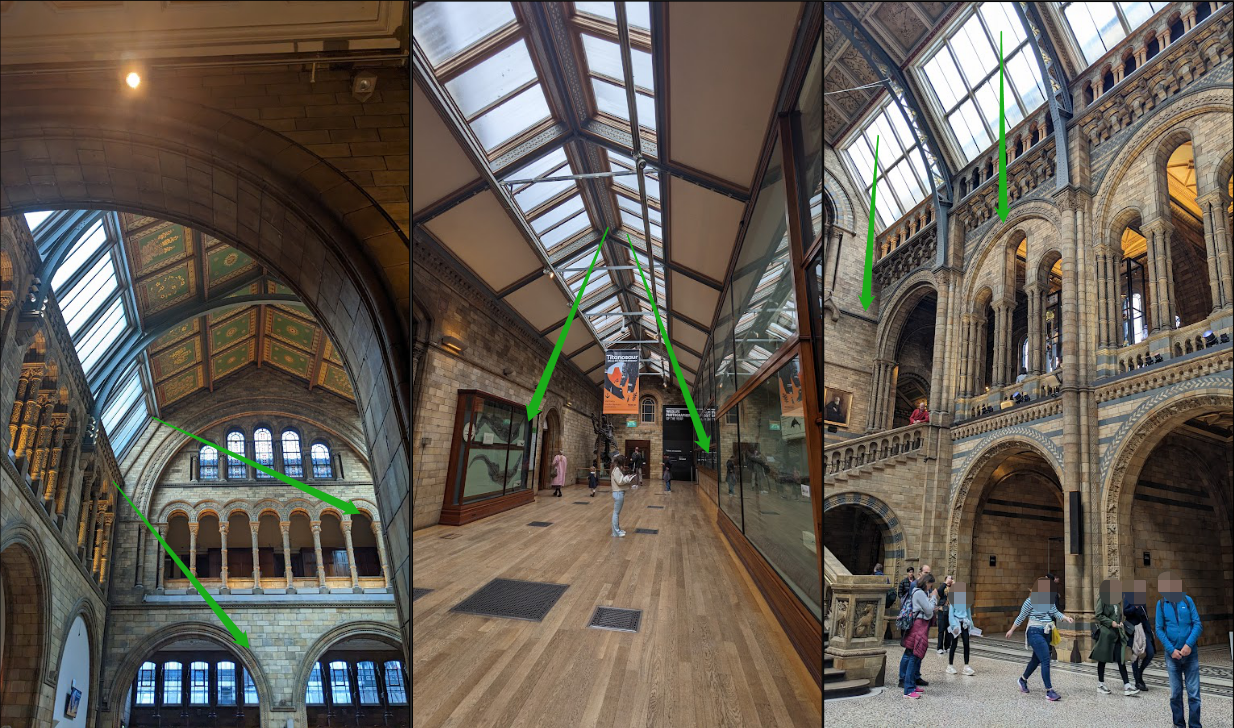
In relation to video game lighting, having too many visible light sources not only leads to unnecessary performance costs but also increases the difficulty of maintaining a smooth transition in overall contrast levels.
Working with intricate surfaces
Elegance, refinement, and ornamentation are a few words that constantly pop up whenever I search for descriptions of Victorian aesthetics online.
In real-world settings, even under identical soft skylight conditions, architectural structures and large-scale ornamentation exhibit a marked disparity with respect to the level of detail and contrast.
In contrast, skylight works much better on flat surface with less glossy material.
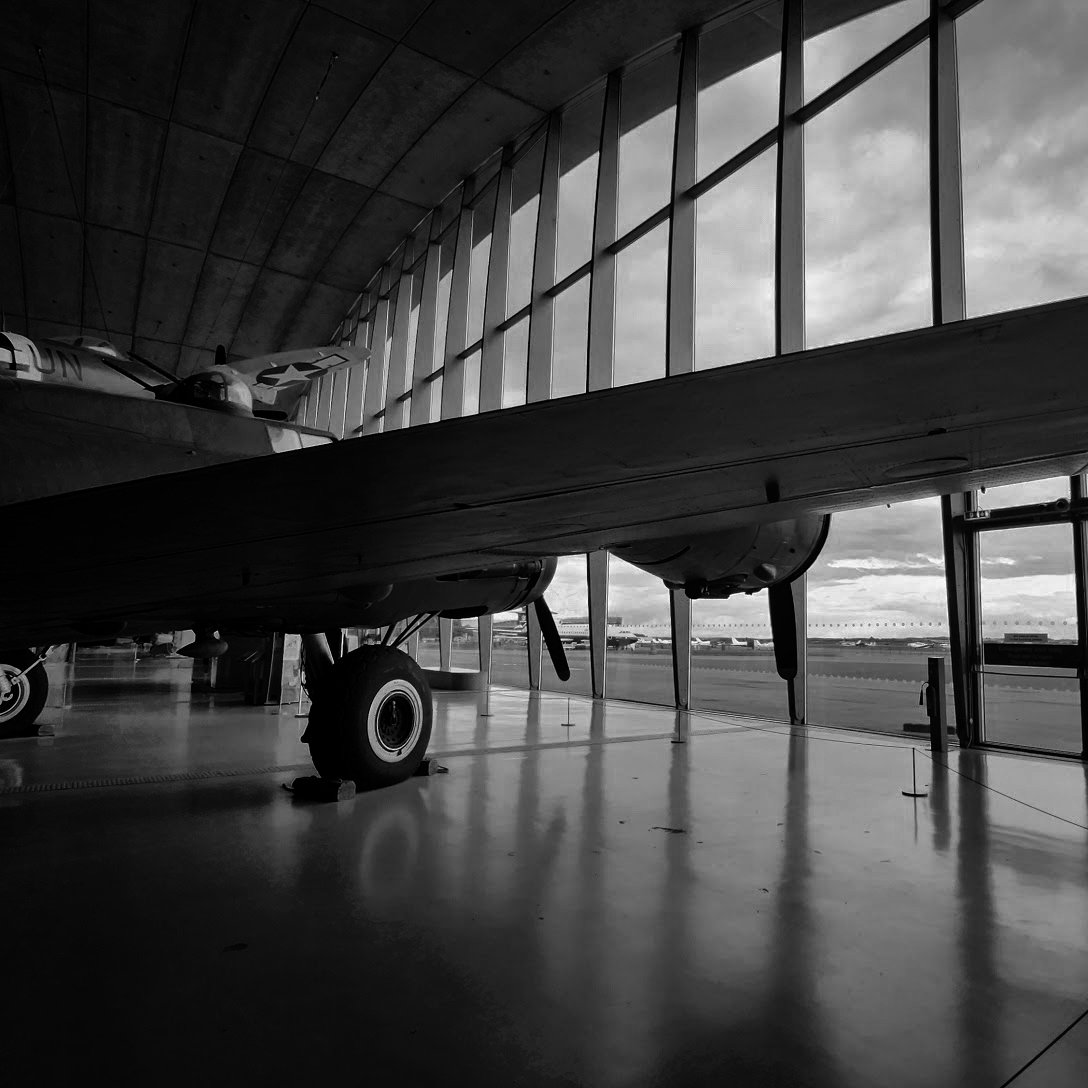
Below is a photo I took while waiting for my train, where the early afternoon skylight resulted in a soft but solid bounce on the floor and ceiling of the quiet platform.

Light texture
Lighting texture refers to the interplay between light and surfaces, which creates visual patterns and effects that enhances the appearance of materials. The directionality, diffusion, shadows, reflections, and color/ contrast of light all contribute to the perception of texture in lighting.
Personally, when lighting any interior with complex surfaces, I tend to keep the light texture sharp in the beginning but soften any secondary and fill light sources considerably afterward.
The primary objective of softening secondary light sources is to minimize undesired reflections. Any light source with a soft source radius of 0 can create artificial hotspots that are highly visible on glossy surfaces.
Soft light and Hard light
The main difference between soft and hard light in terms of lighting texture lies in diffusion.
Soft light is diffused, scattering light in multiple directions, which results in even illumination and reduced contrast between highlight or accent areas and the shadow areas. Soft light helps bring out subtle textures and creates a softer appearance, which is why soft light is more ideal to work as a secondary light source for intricate surfaces.
Hard light, on the other hand, has a more focused and directional quality, leading to stronger contrasts, sharper shadows, and more pronounced textures. That’s why I prefer hard light as the primary light source, or key light as it is commonly named. Hard light is ideal for shaping the overall depth of the scene and establishing the standard exposure range.

Click image above for the full Unreal engine document
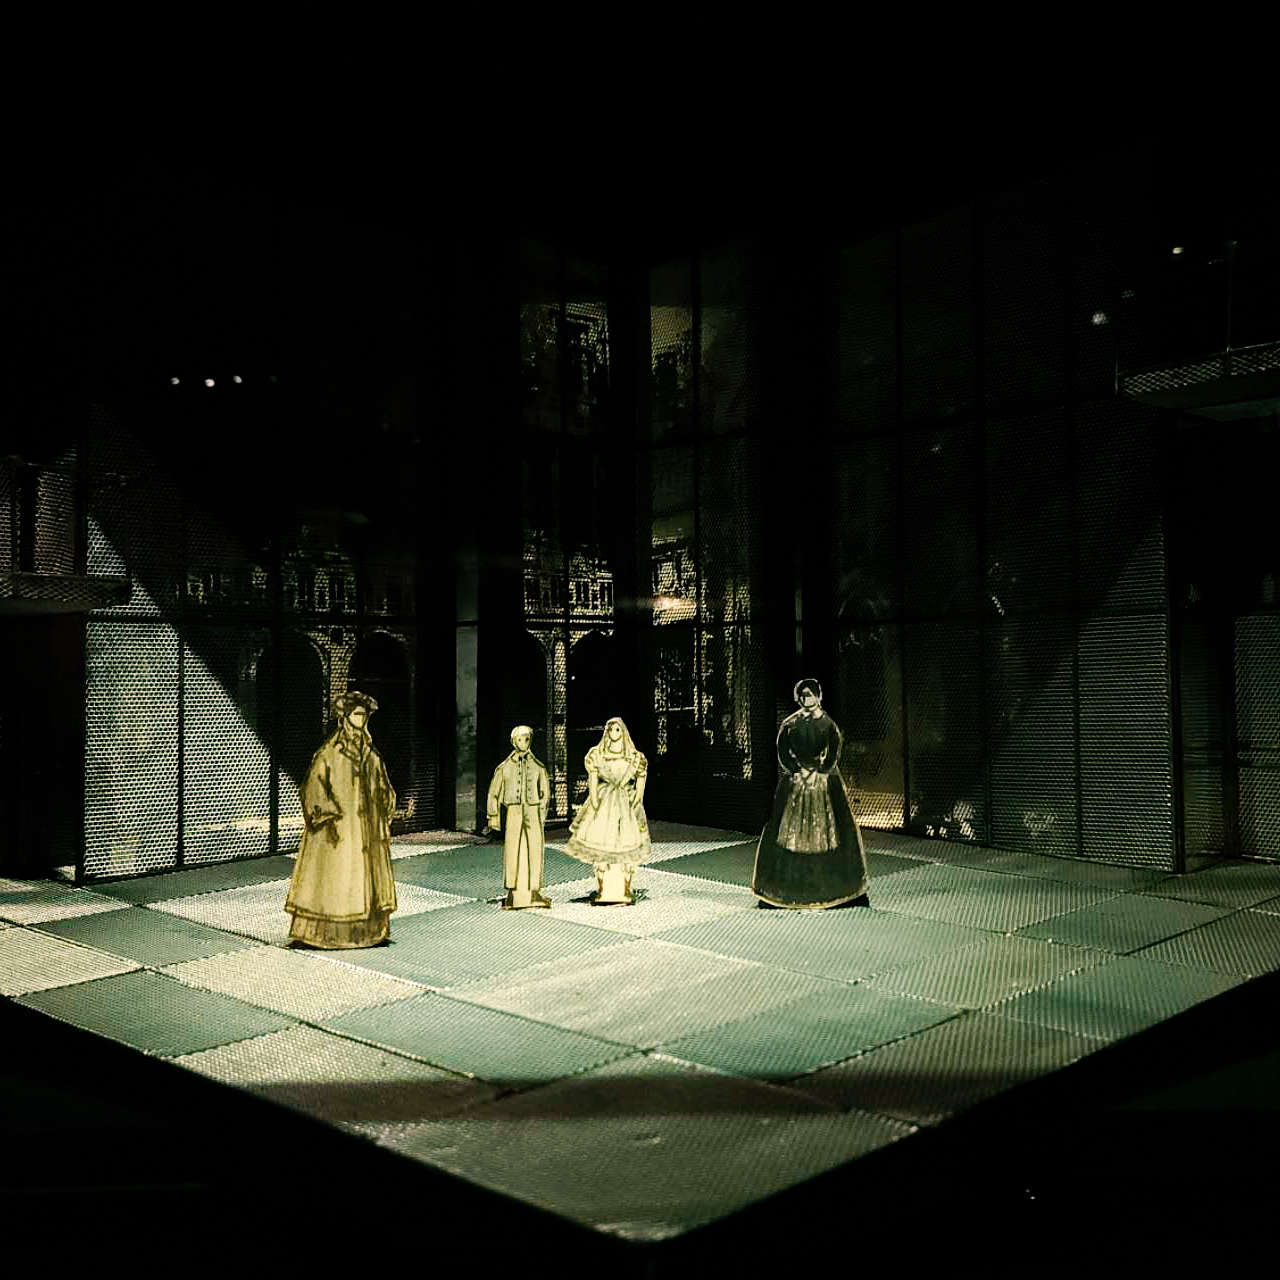
I have maximized the advantage of lighting texture in one of my personal work. The Cage
In the screenshots provided blow, the dappled lighting effect on the ceiling is achieved using one or two spot or rectangular lights instead of skylight. Although using skylight offers a natural and consistent lighting response, in this low-key lighting scenario, it can yield results that are too subtle and realistic.

Instead, I have increased the soft radius on my fill lights, particularly the golden-colored fill light inside the chandelier. This creates a strong contrast between the ‘leaking skylight’ effect and the rest of the interior, demonstrating how lighting can manipulate the perceived depth of a space. In fact, this area is relatively small.
The screenshot above is an example of using hard light as the primary lighting source, but with a twist. The ‘leaking skylight’ serves as the only light source in this area. To achieve the desired effect, I have softened the lighting texture while increasing the brightness of my primary light source.
This lighting approach allows my scene to have higher contrast while maintaining a dreamy mood, characterized by soft transition between bright and dark areas.
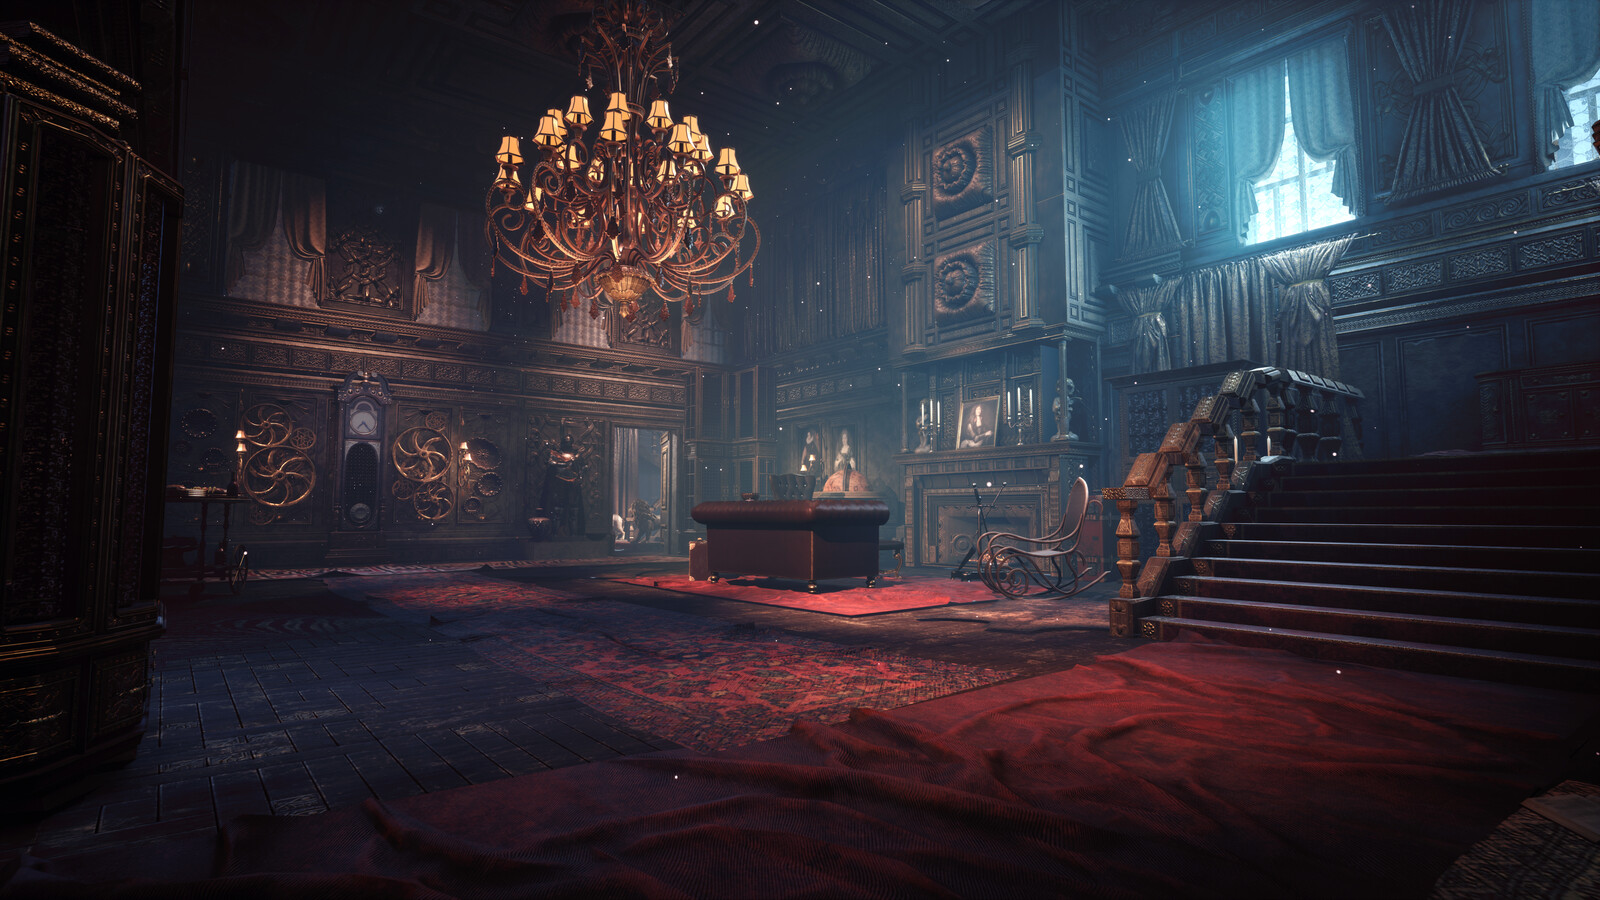
The final screenshot represents a fusion of the two previous approaches. In this section, I aim to disclose intricate details of the interior while simultaneously creating a seamless gradient and contrast transition from the window above the staircase to the remainder of the scene.
I have attenuated the light texture emanating from the key light streaming through the window, along with the fill lights within the lobby. the only hard light source in this setting is the spotlight positioned above the red carpet. This supplementary spotlight serves as my primary key light in this scene, as it predominantly defines the objects in the foreground.
Drawing inspiration from the extraordinary lighting installations found in museums and galleries in London, I have shared my insights on interior lighting, along with some personal examples. Thank you for taking the time to read my thoughts on this topic.