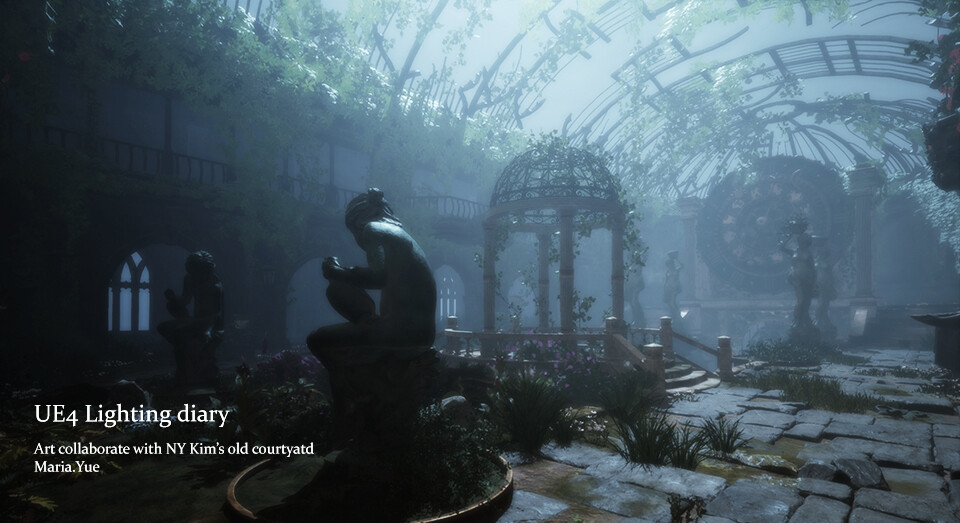
Art collaboration with NY Kim
Hello and this will be my first lighting diary,
This diary is written in backward order. the latest update will always be on the top 🙂
Brief
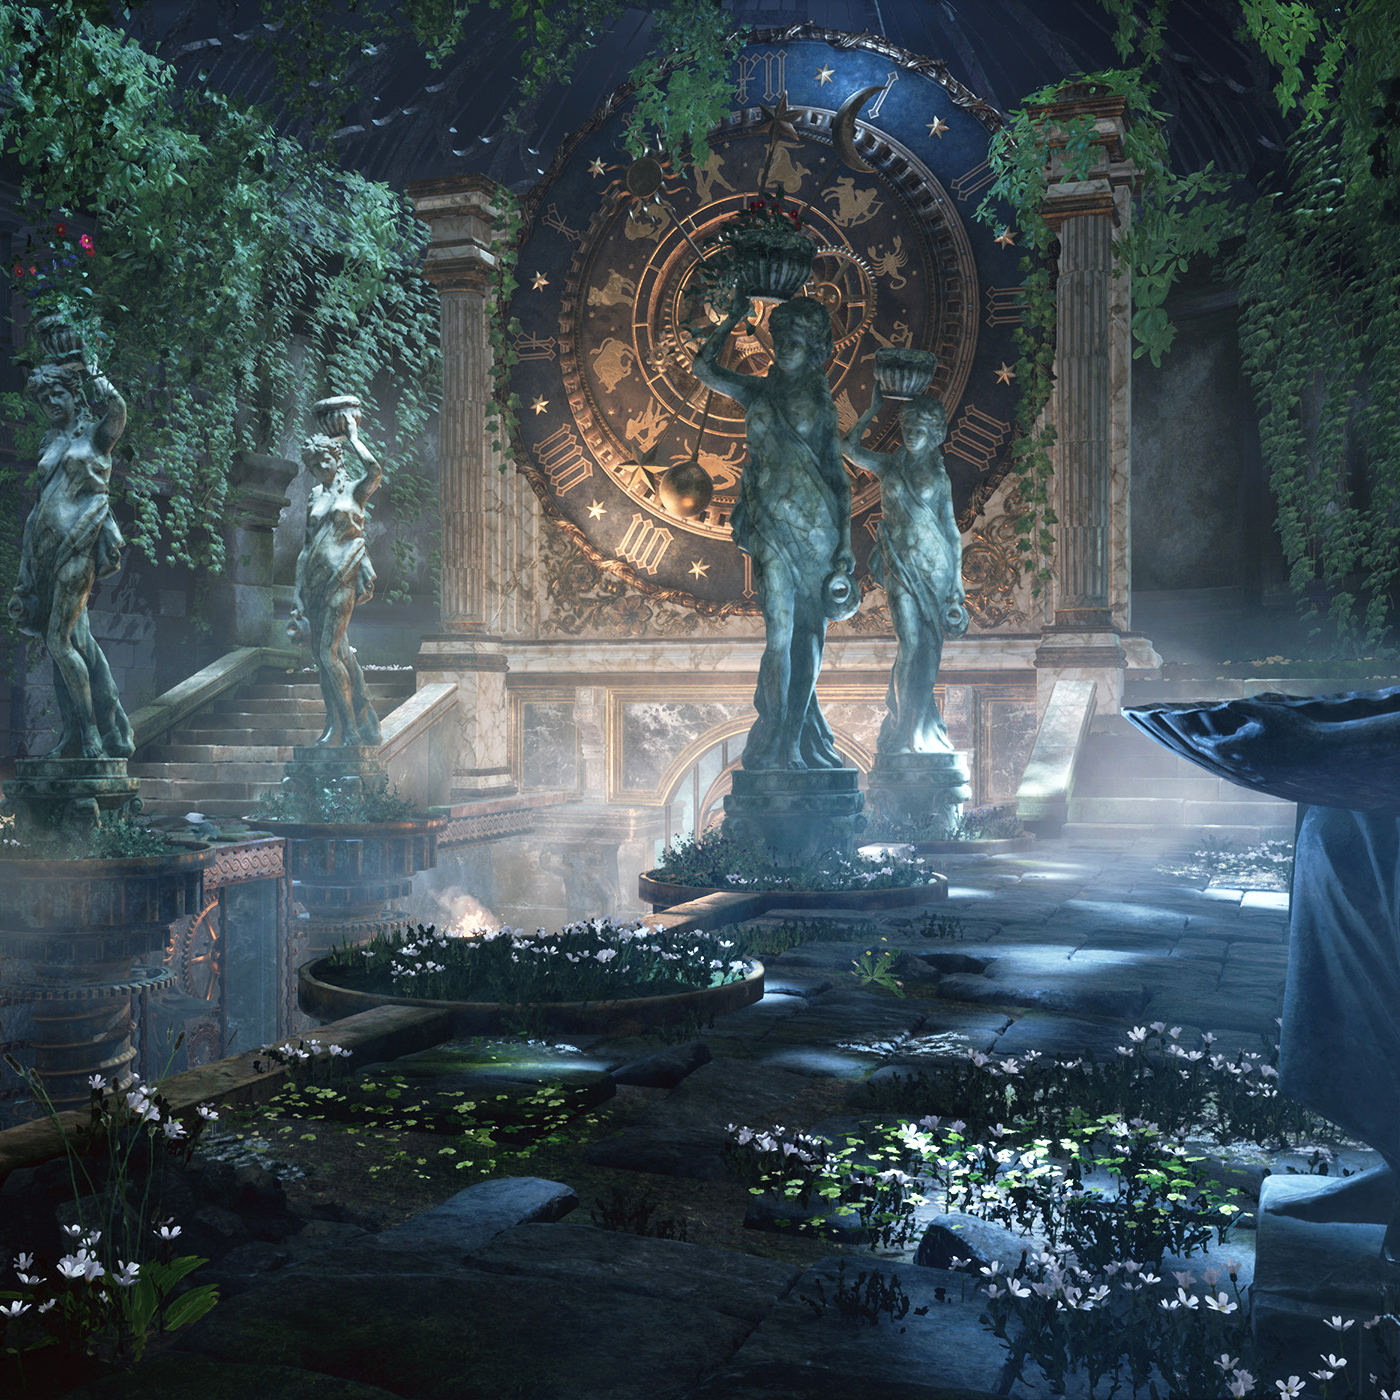
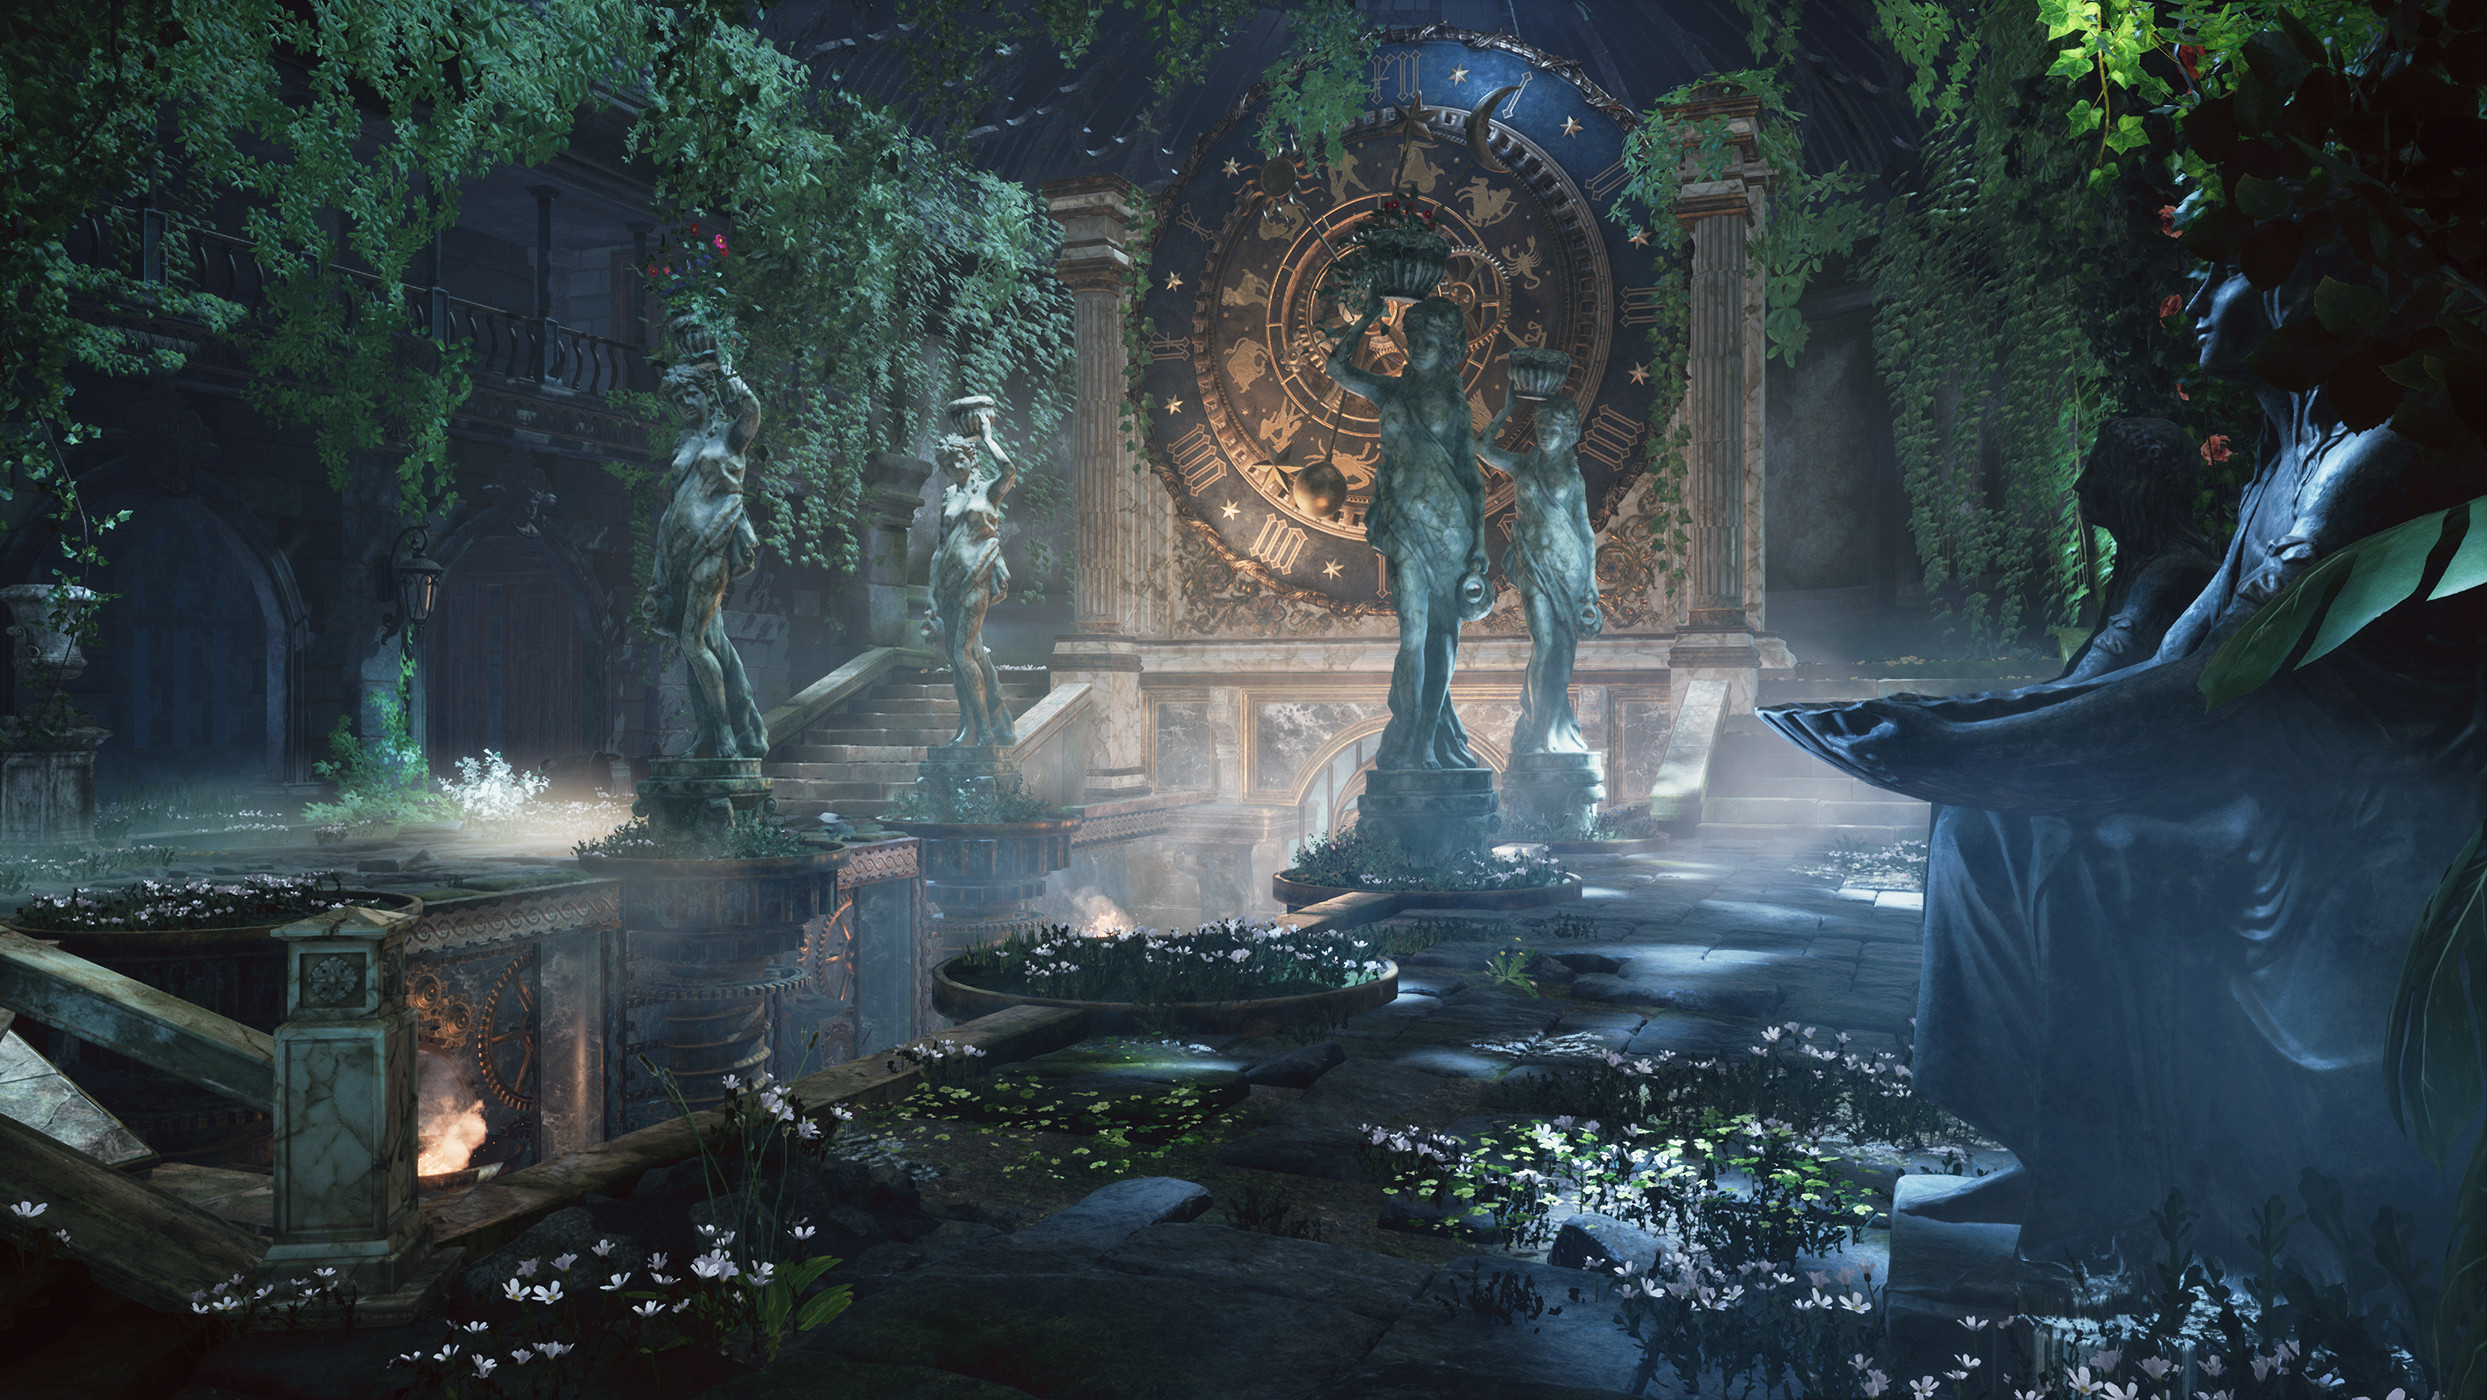
This diary is about recording my progress in creating a lighting design based on Na Young Kim’s amazing environment – The Old Courtyard
I decided to start slowly recording my thinking progress here mostly for myself, about artists/ artworks that inspired me, and the reason why I make those decisions. Please consider this as a simple craftswomen’s diary.
It all starts on a weekend morning, I saw his work while launching my UE4, and that bright green screenshot of the day grasped my eyes.
I almost immediately dropped Kim a message on Artstation and asked if Kim would allow me to do a lighting design based on his amazing piece.
London is still under lockdown and I had my second annual holiday at home ^^
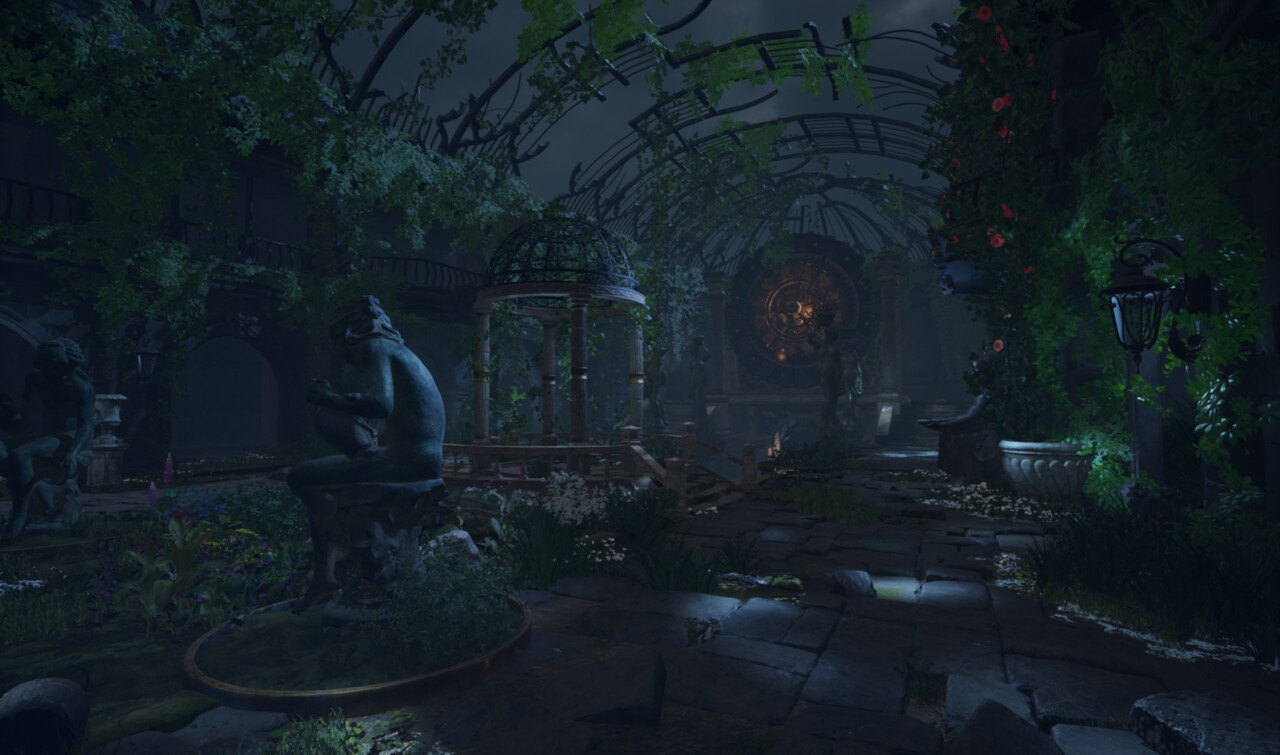
Finally found myself some time playing games, and continue this piece. I love listening to baroque music while working, today’s working BGM is water music from Handel. Suit 1, HMV:348, Minuet. As I am gonna create some dappled light effects and make it dance in Kim’s beautiful courtyard.
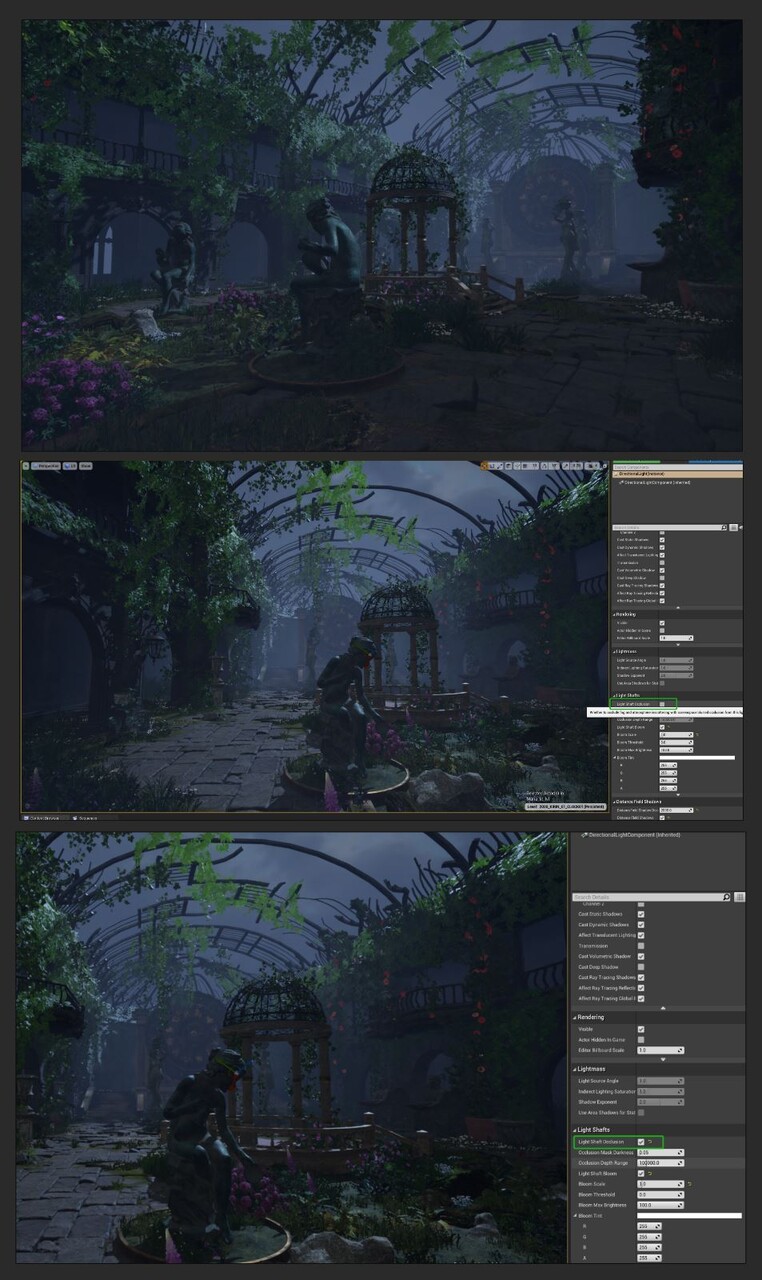
Again, before the sweet lighting painting part, I decided to double-check my LPV setup, as LPV does work well with SSGI together. Decide my ideal GI setup for my ‘canvas lighting’ after the test below.
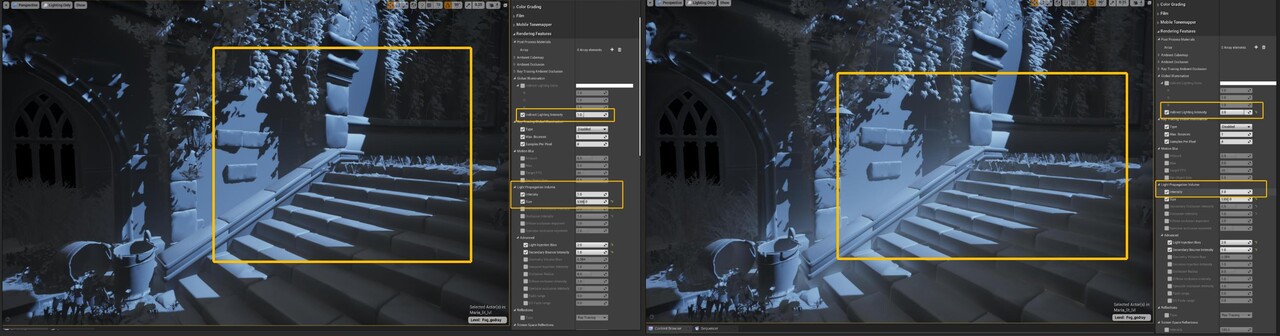
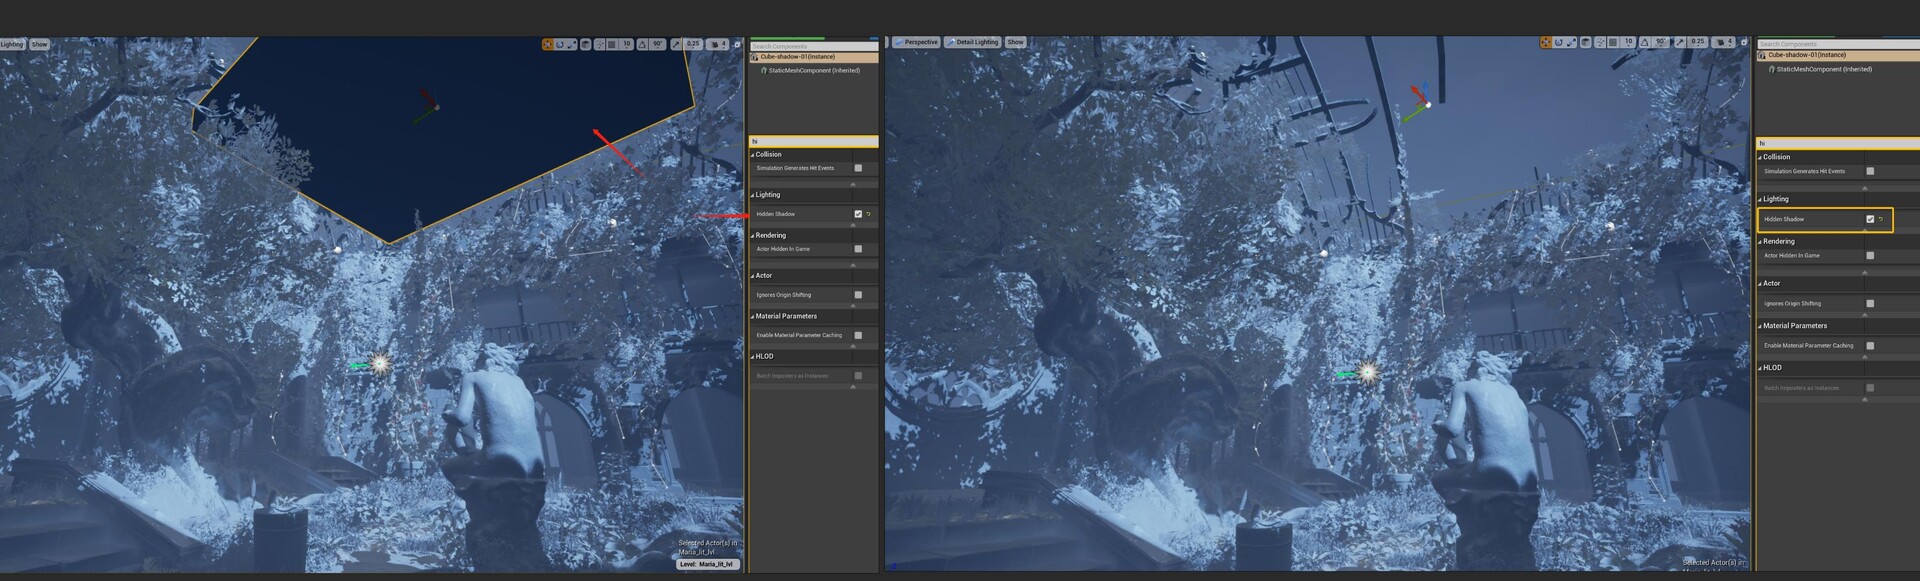
Back at university, I was training for photography and stage design, the most counterintuitive experience I had in photography, stage set design, and CG lightning is the difficulty level of controlling shadow and light leaking. In real-life lighting, negative fill, or shadow flag/board is one of the most time-consuming steps while setting up field lighting for show/ photo shooting. This step became so much easier in UE4, All I have to do is choose the hidden shadow function in the mesh setup.
With this function, I can use hidden mesh as my negative fill, or shadow caster as how we usually call it in game development.
A reason that CGI lighting fascinated me so much is, it seems like a craft based on good decisions on both taste and tech aspects. Moreover, the final result is just a matter of personal taste. Maybe that’s why we need an art director in production, as 100 lighting artists could reveal 100 different ways of handling a peaceful/ anxious scene.
In the very scene, my key light angle serves well to shape-up my scene and drive the fog scattering. However, even with the ceiling shadow off, the shadow projection on my floor is not that sweet yet. And here is where the negative fill method is required before starting paint details with an additional light source.
Shadow Flag/ Negative fill

The shadow projection on the right side is accurate, but it is not pretty to me, which is why I decide to install a few negative fill mesh on the upper right area. When working on my negative fill, I usually use light-only mode, seeing the entire scene as a black/white sketch, and reading each area carefully in terms of bright/dark zone proportion. Perhaps this is the very reason I say the result is only a matter of personal taste. I need a more shady area to decrease the bright area on my floor, so there will be enough space for a dappled lighting effect later,
In addition, clear lighting works best for complex scenes. Certainly, there will be much more interesting dress-up for important details light-wise. As for the ‘canvas lighting effect’ here, I want to build a clean startup before the artistic touch. control the shadow before controlling the detail lighting is my usual way (again a result of personal taste only lol).
Few more areas with the same treatment I explained above.
While doing the ‘canvas lighting’, with the exposure locked, I keep all of the post-process off, please be aware that is not mean there is no post-process, there is just no customized post-process as Unreal will still present the scene with its default post-process on.
I think it’s a good startup set if the scene indicates where the light comes from, the time of day, with most of the detail in the scene still reserved. Usually, the contrast should be low and it might look a bit dull, as the scene only wears a very gentle lighting touch indicating the necessary information above. In return it means the scene has lots of potential for the next step, regardless I want to push it up to drastic contrast, or tune it down into even dreamy looking.
Finally, I can start painting with light for the right area, as the directional light angle and negative fill create a quiet shadow zone for detail lighting.

Nov 11
An interesting discussion with Kay
A few days ago, I had a very interesting discussion with Kay Volbeda about ray tracing distance setting in UE4 in our discord group. As I do plan to use RTX reflections on top of my current pipeline. Key gives me a very valuable insight that answered a question I had for quite a while.
r.raytracing.reflections.maxraydistance
According to Kay, this is a very good one for reflection accuracy, also it defines the ideal range to sample your reflections. the larger the number, the further the radius for the reflection sample area. I will save this point and give it a go in my final touch.
Apparently, we have two plan for RTX reflection, which is influence factors below
-Directional lighting/ Skylight
-indirect light (GI)
-shadows
-height fog
-reflection captures
-translucency
r. raytracing.reflections. hybrid
To enable a hybrid method with RTX reflection + SSR
r. raytracing.reflections. maxroughness
To limit max roughness for optimization reasons.
Lighting design decisions
I spend last night working on my key light angle, in this case, it is a directional light source acting as my moonlight. The first thing I decide is turning off the shadow casting for roof meshes, it helps me to get a neat look at the scene. With less destructive shadow casters, I can make a better call about the directional light angle.
In contrast to my usual working habit, I introduced fog into my scene very early this time, usually fog will not be my concern until I finished the key light set up. As I am doing a nighttime scene, which heavily relies on indirect/ scattering lighting effects. I would like to have a clear opinion on the overall layer of the scene.
At the beginning of each project, I tend to spend quite an amount of time on the key light angle, as it not only shapes up the objects, it also matters the other lighting effect compositing wise. Such as fog, volumetric based particles, and animation.
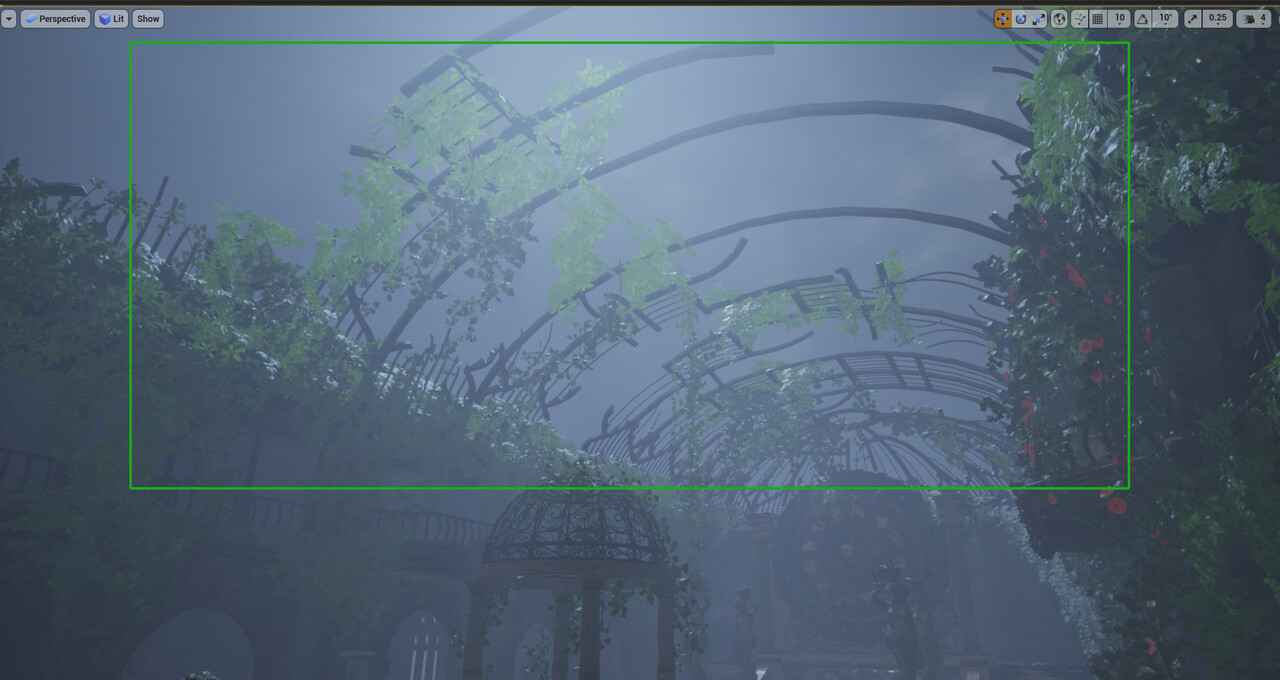
Below is the final direction light angle I decide, to give me a better sense of the `layer` of the environment, I tend to over dense my fog in the beginning so I can decide the start distance range based on this obvious fog effect.
The reason for choosing the current angle is simple. after turning off the shadow caster on the ceiling area, the directional light shows a clear influence on shaping up assets in the courtyard rather than projecting the unnecessary pattern from the ceiling object to the floor.
My working music for last evening is Vivaldi, Summer in G minor RV.315, I never an expert on classic music XD, but I like how many layers those classic masters are able to reveal in their works. I think visual and music have a similar vocabulary at this point. This could be just my rambling on.
The directional light angle provides me a decent `empty stage` in the foreground, meanwhile, it shapes the entire scene well from multiple angles. I guess that convinced me to go with this one, I think to keep checking how light behaves at a different angle is very important for level lighting, as we are never able to limit how people gonna experience a 3D environment.
The second image is how it looks in the other corner with the same lighting condition. with directional light occlusion on/of I find a balanced point for possible fog density. I decreased the fog density in the 3rn image so that is my `canvas` lighting.
Now it’s ready to start the fun part, artistic lighting design.
Nov 4
We had a lovely chat on discord and Kim kindly arranged to share the file with me.
I start gathering references and possible ideas immediately because I really excited about our little project
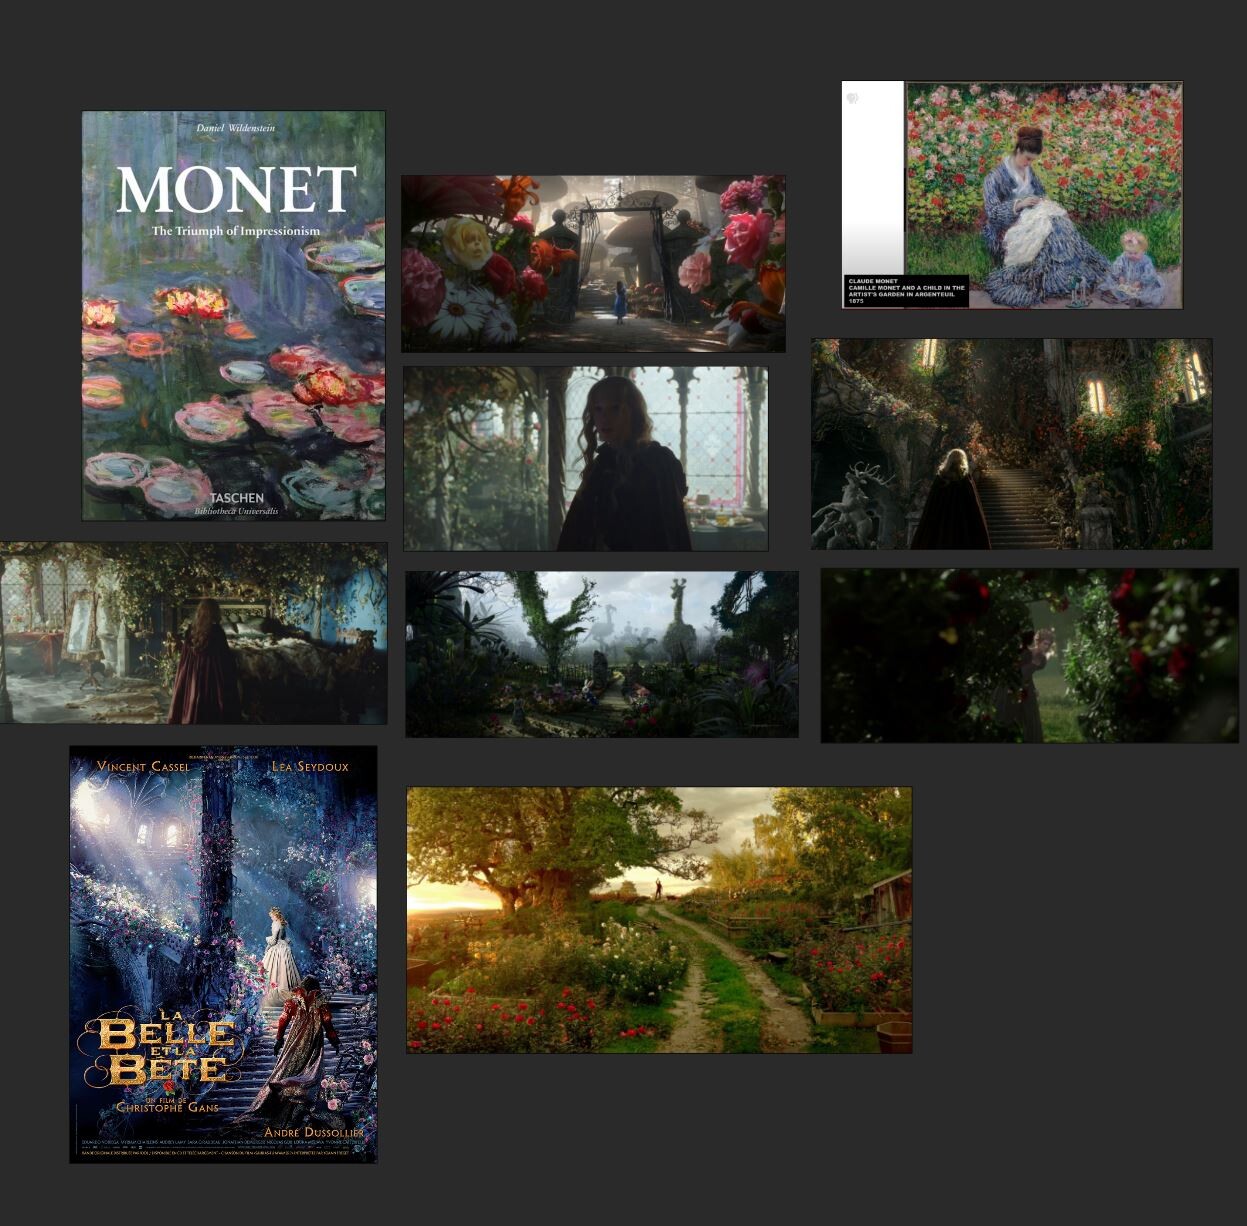
The first impression of Kim’s environment reminds me of Makoto Shinkai’s movie, The garden of words. Since I usually use lighting as a visual language to give a sort of ‘character interpretation’ to the environment, the first idea I got is through a completely different time of day other than the original artwork.
I always want to try to implement my favorite art style- impressionism into my 3D lighting work, the major reason Kim’s work excites me as I feel this environment could be a perfect fit for the style experiment.
My initial mood board about styles I am trying to approach.
all rights reserved for the original author.
Nov 09
I finally get the file shared from Kim, once I opened his level, more and more lovely details keep me hyped working on this art collaboration.
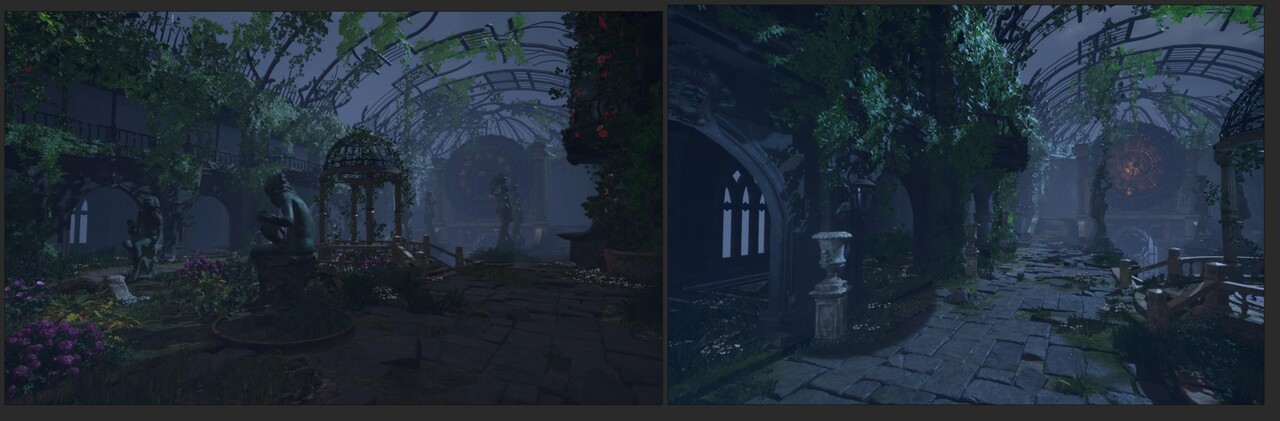
The first challenge I realize is those Ivys, it is very easy to have crispy/ noisy looking if I do not light it carefully. I decide to go with tranquility and simple looking for my base lighting, here I decided to go with a higher angle, with a directional light angle above 45 degrees.
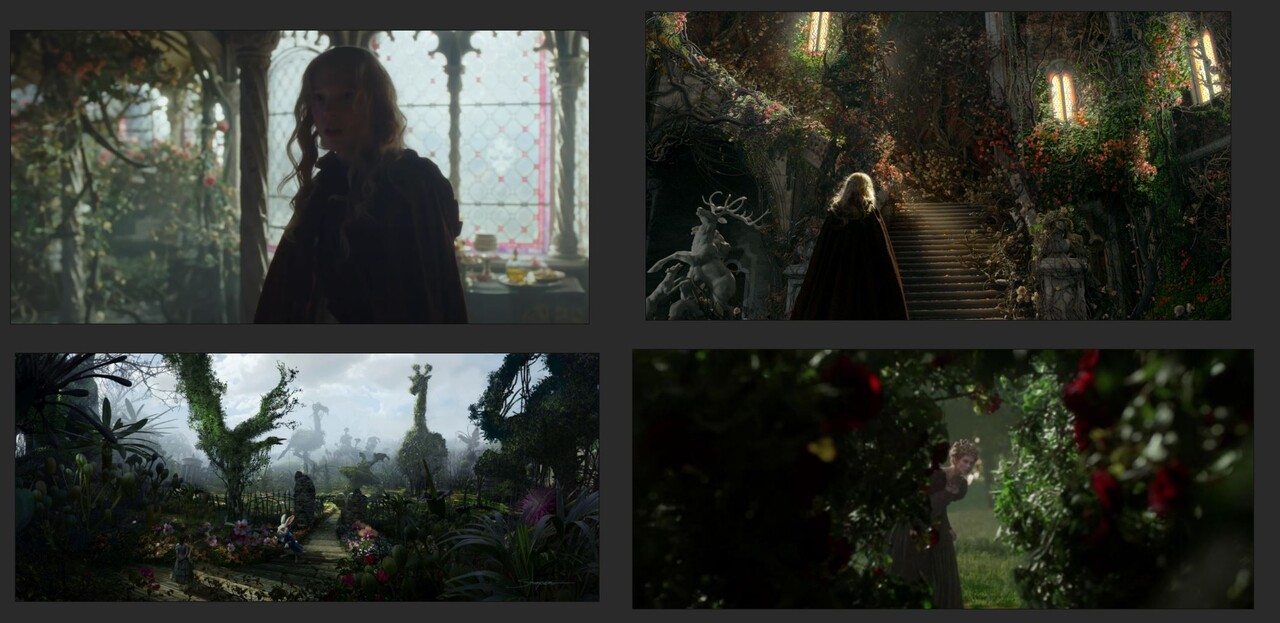
I found this lovely reference from the movie Beauty and the Beast 2014 as a perfect idea for lighting Ives.
Regardless of the soft lens and post-process, the rim light angle inspired me on how to tackle my key light direction.
Kim’s original work has a pre-baked lighting setup, and I decide to leverage the real-time lighting workflow for a better material response, and more control of the scattering effect.
For now, I decide to give SSGI a go and see how it reacts to the scene, as the level has quite a lot of assets to interact with each other.
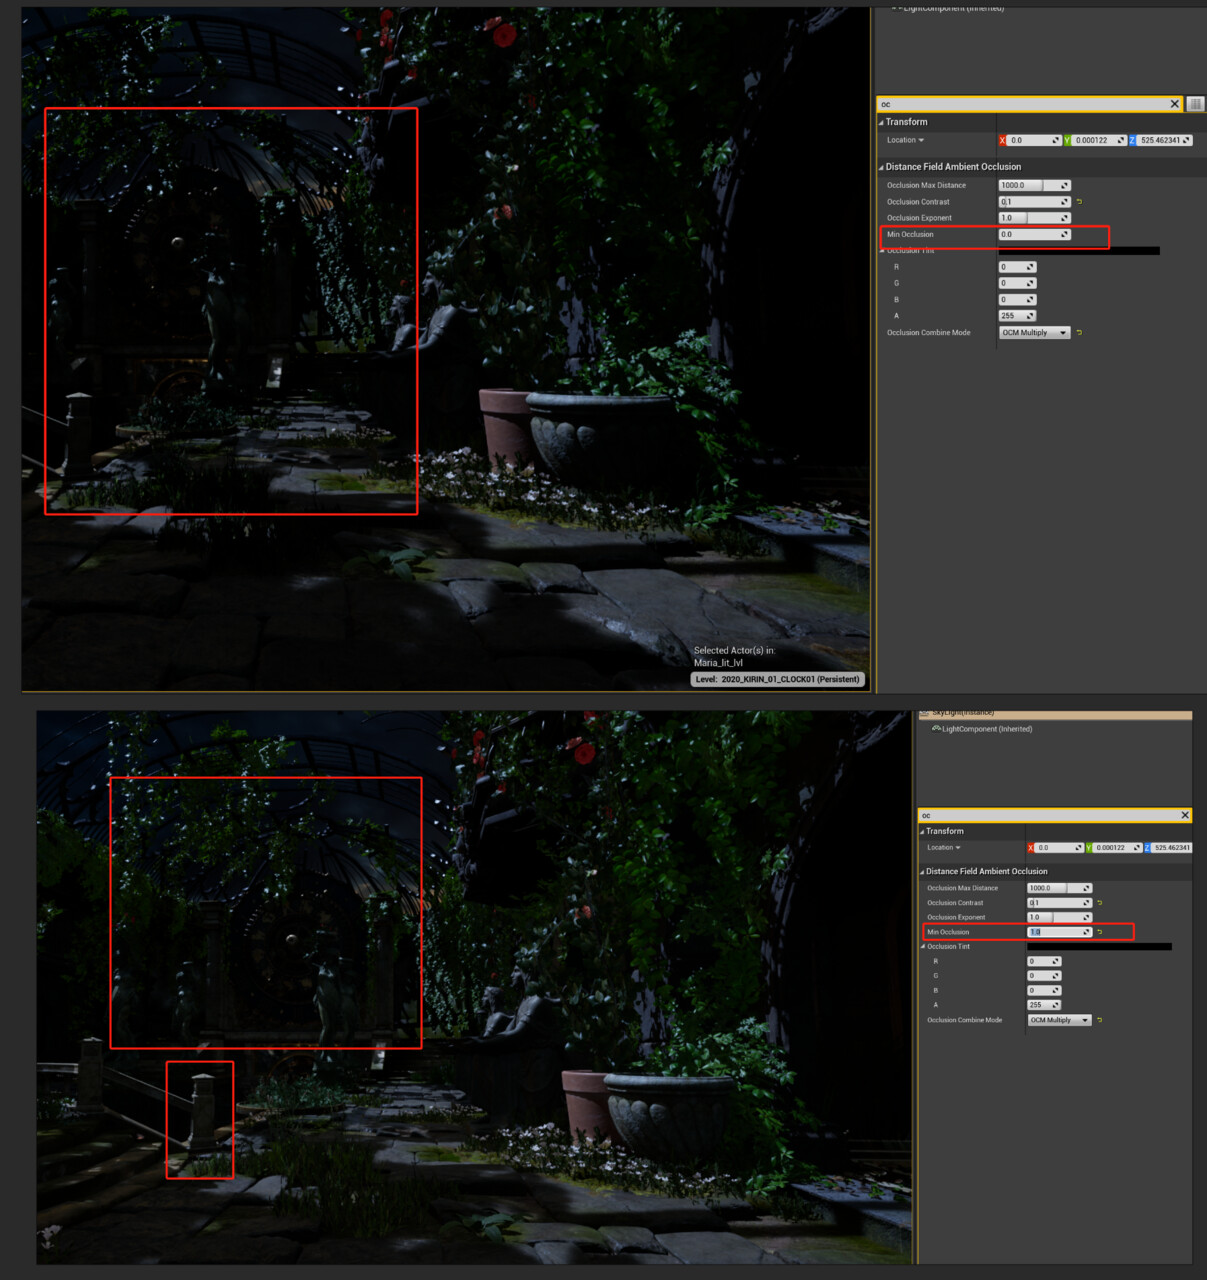
Since I was very curious about how much distance field shadow/ occlusion control I have in this setup, I did some quick tests below.
so I have a dynamic skylight + directional light and plan to use skylight occlusion to test the distance field occlusion.
As I got the response from my distance field control, the next part will be to design the key light and more artistic job 🙂

–to be continue